Since I went Mrs. Clean on my house 2 weeks ago and organized each and every crevice; my usual chores have been few and far between. With all this new time on my hands I’ve of course come across a few “projects” to tackle and I’ve decided to fill you in on my latest!
This project was not only incredibly affordable but was a total piece of cake! I have been trying to decide what I can do with all these extra pieces of fabric lying around and after a totally failed attempt at trying to attach scrapbook paper to canvas, I decided to repurpose the fabric in a somewhat similar fashion. I’ve seen the idea around and have heard of friends doing similar projects but couldn’t find a “How-Two” anywhere so I decided to tackle this on my own, didn’t seem too difficult!
The Items I used I already had or picked up on random outings to the craft store here and there. The letter P I planned on using for another project but figured I could use it more effectively on something like this. Plus, I can always pick another one up. The Flower I just saw in a clearance bin at Michael’s one day and thought it would look cute. I grab weird things all the time and never know what I’ll use them for, until I do!
Anyhow, here are the items I pulled together for this project. . . .
Supplies
- 4 Canvas Boards (Whichever size you prefer, I chose the small 4 pack they offer at the craft store)
- Random fabrics (best if you can find a color scheme or something to pull together)
- Staple Gun (+ Staples)
- Hot Glue Gun ( + Glue Sticks)
- One Wooden Letter
- One Large Flower Accent
The accents are totally optional and you can of course add whatever you would like to spice this party up, I just personally went with what I already had. Or you can even just leave them blank, whatever blows your skirt up.
So lets get on with these fool proof steps so you bitches can all go on with your day . . . .
Directions:
Step 1: Grab one of the fabric remnants you want to utilize and make sure it’s ironed flat. Lay one of the canvas squares on top and cut roughly 2-3 inches around each edge.
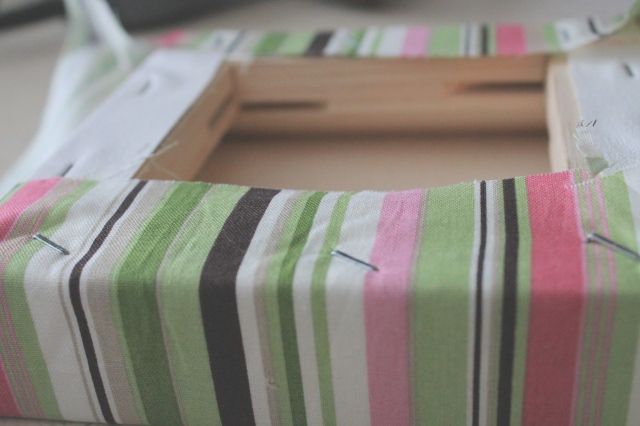
Step 2: Take the bottom and top edges and fold them over the back side of the canvas. Make sure to pull them tight and begin stapling along the wooden frame.
Step 3: Once complete, work on the left and right edges and do the same. Fold each edge as if you were wrapping a christmas gift. This part is a little difficult (especially for men – if any men are ACTUALLY reading this right now- but seriously, what is wrong with you, why can’t you comprehend folding paper around a box?? It’s mind boggling. We all know you could make the best paper airplanes in 2nd grade. Stop pretending you’re so awful. ) but if you make sure to really tighten up the fabric, you’ll be all set.
Ok, so this first one might not be the prettiest thing you’ve ever seen but hey, I’m totally winging this! Plus, it’s the back of the canvas, who cares! My second one went MUCH smoother. I found it easier to staple the inside fold then the outer fold. More staples but a cleaner look. It’s up to you!
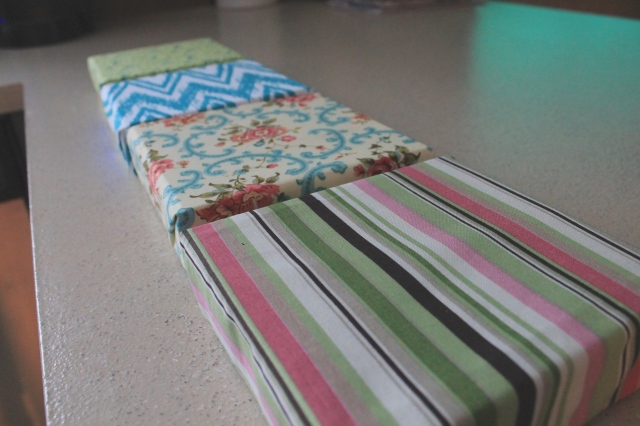
Once you’re finished you should have a smooth, clean and pretty little fabric covered canvas. Once finished with all four you’re ready to decorate! As you can see below, the first one is clearly the “demo”. I got a hang of it by the second, third and fourth. #ThankGod.
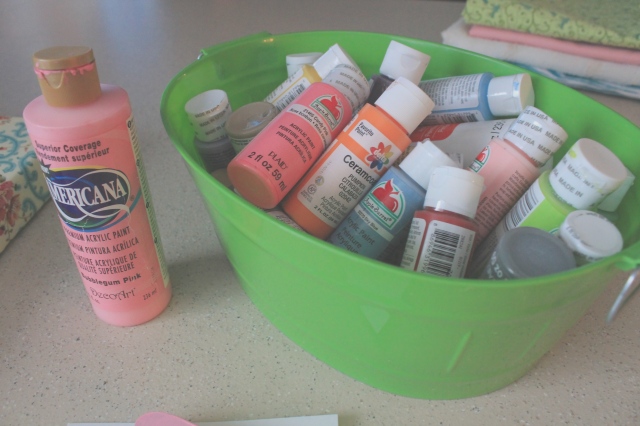
Step 4: Grab your wooden letter and start painting. (That is, IF you are painting said letter. You may want to leave it black or white or even wood, whichever it came in to begin with. I was stuck with black and was going for Pink so I had to bust out my paint collection! )
If you don’t already know, paint is typically wet for a while (Yes I just said that, you never know who’s reading) so lay your letter aside afterwards allowing time to dry. I use the cheap acrylic paints that take rarely more then 30 minutes to dry. If it helps, you may want to use a primer on black letters too (if that’s what you ended up with), as it didn’t cover with one coat.
Step Five: Get to glueing! Make sure to heat up your hot glue gun and add whichever little details your heart desires. First, I glued the flower on. I had to remove a bit of hardware from the back before attempting to attach but it went on with no major issues.
Next came the Letter P. I literally drenched the back of this thing in glue as I was afraid it wouldn’t stick. It stuck just fine, no worries here!!
TADA! There you have it, you’re done already. I hope it went as seamless for you as it did for me, this project really was a synch! Not to mention it’s adorable. Now I just have to decide whether to hang it in my Daughter’s room (Paige) or my new and colorful craft room! -Which I will totally blog about later, I’m in love with how it’s coming along!!)
So there you go, another project down in the books, another post to finally blog. I’m almost as proud that I’ve completed another post as I am that I completed the craft at hand. #TrueStory. I hope you enjoyed the project and that it’s something you yourself can re-create! Feel free to share your results and let me know, are there any projects you yourself have recently attempted??
Cheers!
♥ – C


This does seem like a simple and fun project to do. I like how yours came out, nice choices for the fabrics as well!
LikeLike
Thank you!! The fabrics have been left over from projects past but I recommend buying remnants from Joanne for things like this! Can get super cute stuff for cents on the dollar! Let me know if you try it yourself! 🙂
LikeLike
No problem. I actually have some fabric just sitting around I was going to use for a couple of pillows. Just might have to buy some canvas now. Do you know the average price of a staple gun?
LikeLike
I wish I did first hard! My father in law let us borrow his, AKA he hasn’t seen it in months and probably never will again as long as I love!!! It looks to me like anywhere from $15- $40. The electric ones work the best and are around $30 at Home Depot!
LikeLike
Lol, sounds like you’ve done a lot of projects with it. Thanks, I’ll check them out.
LikeLike
You’re the hottest staple gun wielding bitch I’ve ever seen! 😉
LikeLike
Oh heyyyyy! I do love me some ammunition. Staples will do! 🙂
LikeLike