Crafty Canvas Covers *

Since I went Mrs. Clean on my house 2 weeks ago and organized each and every crevice; my usual chores have been few and far between. With all this new time on my hands I’ve of course come across a few “projects” to tackle and I’ve decided to fill you in on my latest!

Canvas Creations

This project was not only incredibly affordable but was a total piece of cake! I have been trying to decide what I can do with all these extra pieces of fabric lying around and after a totally failed attempt at trying to attach scrapbook paper to canvas, I decided to repurpose the fabric in a somewhat similar fashion. I’ve seen the idea around and have heard of friends doing similar projects but couldn’t find a “How-Two” anywhere so I decided to tackle this on my own, didn’t seem too difficult! 

IMG_2801

The Items I used I already had or picked up on random outings to the craft store here and there. The letter P I planned on using for another project but figured I could use it more effectively on something like this. Plus, I can always pick another one up. The Flower I just saw in a clearance bin at Michael’s one day and thought it would look cute. I grab weird things all the time and never know what I’ll use them for, until I do!

Anyhow, here are the items I pulled together for this project. . . . 

Supplies

  • 4 Canvas Boards (Whichever size you prefer, I chose the small 4 pack they offer at the craft store)
  • Random fabrics (best if you can find a color scheme or something to pull together)
  • Staple Gun (+ Staples)
  • Hot Glue Gun ( + Glue Sticks)
  • One Wooden Letter
  • One Large Flower Accent

IMG_2796

The accents are totally optional and you can of course add whatever you would like to spice this party up, I just personally went with what I already had. Or you can even just leave them blank, whatever blows your skirt up. 

So lets get on with these fool proof steps so you bitches can all go on with your day . . . .

Directions:

Step 1: Grab one of the fabric remnants you want to utilize and make sure it’s ironed flat. Lay one of the canvas squares on top and cut roughly 2-3 inches around each edge.

IMG_2803

Step 2: Take the bottom and top edges and fold them over the back side of the canvas. Make sure to pull them tight and begin stapling along the wooden frame. 

IMG_2804

IMG_2806

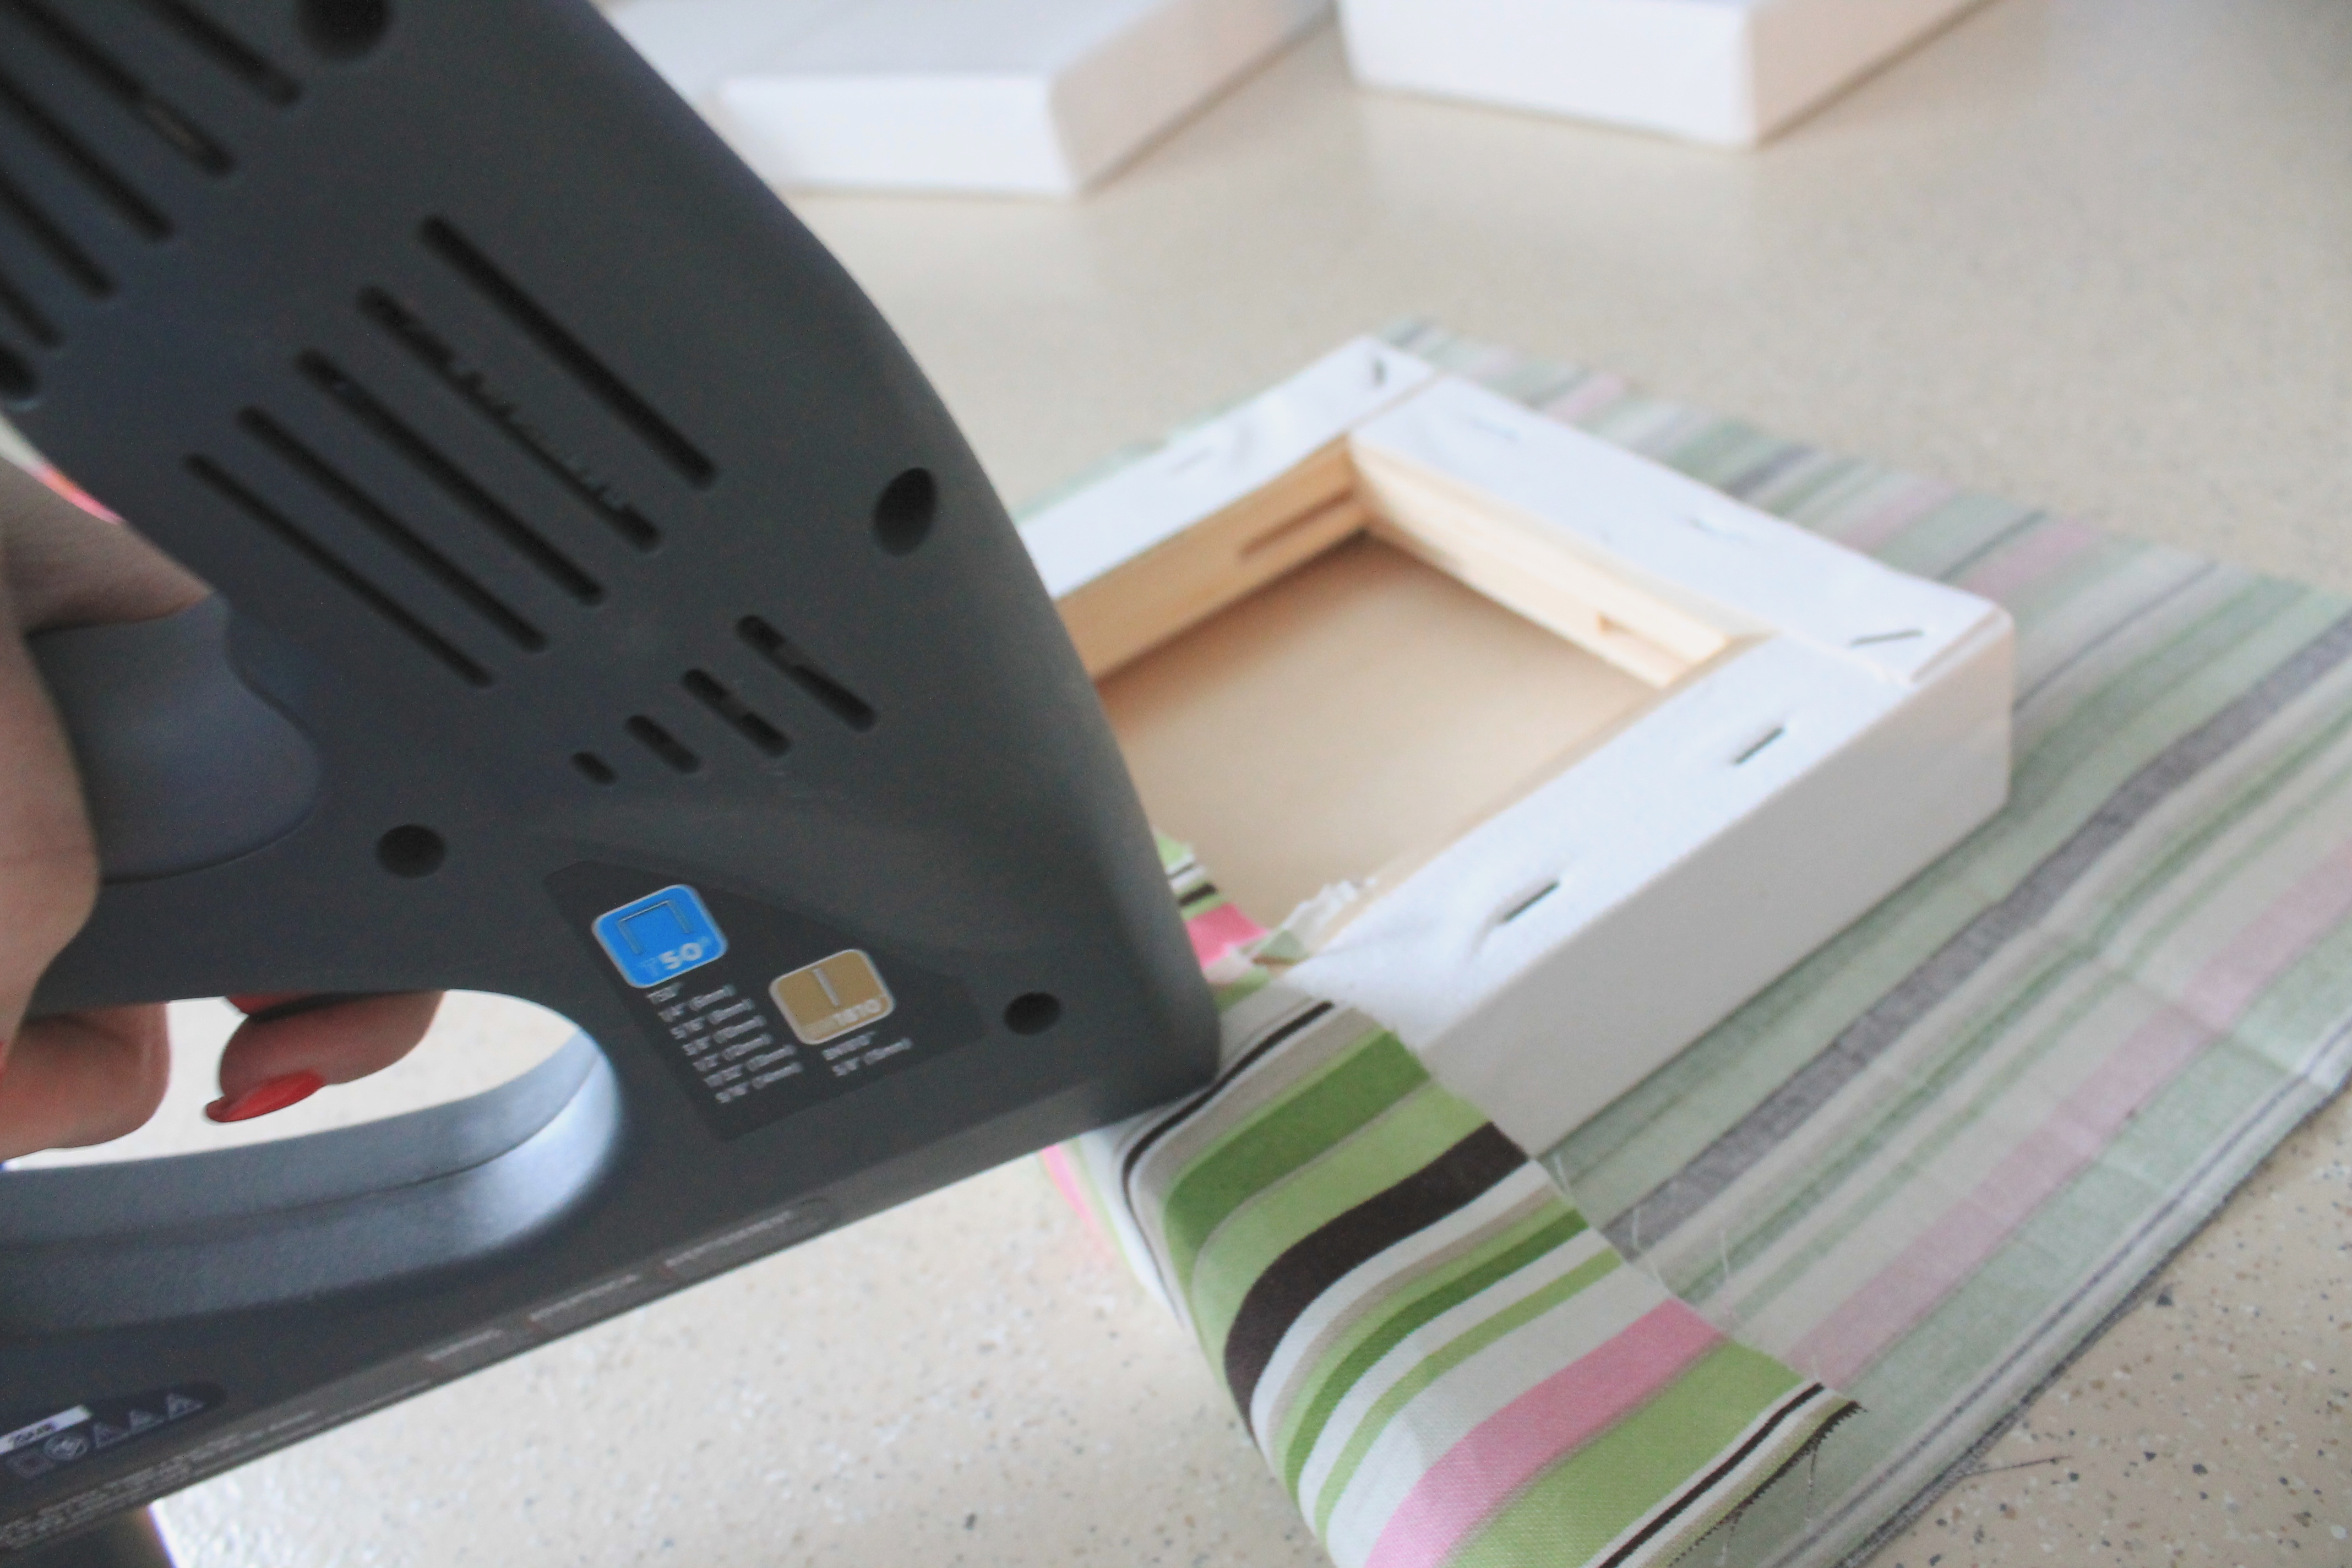
Step 3: Once complete, work on the left and right edges and do the same. Fold each edge as if you were wrapping a christmas gift. This part is a little difficult (especially for men – if any men are ACTUALLY reading this right now- but seriously, what is wrong with you, why can’t you comprehend folding paper around a box?? It’s mind boggling. We all know you could make the best paper airplanes in 2nd grade. Stop pretending you’re so awful. ) but if you make sure to really tighten up the fabric, you’ll be all set. 

IMG_2807

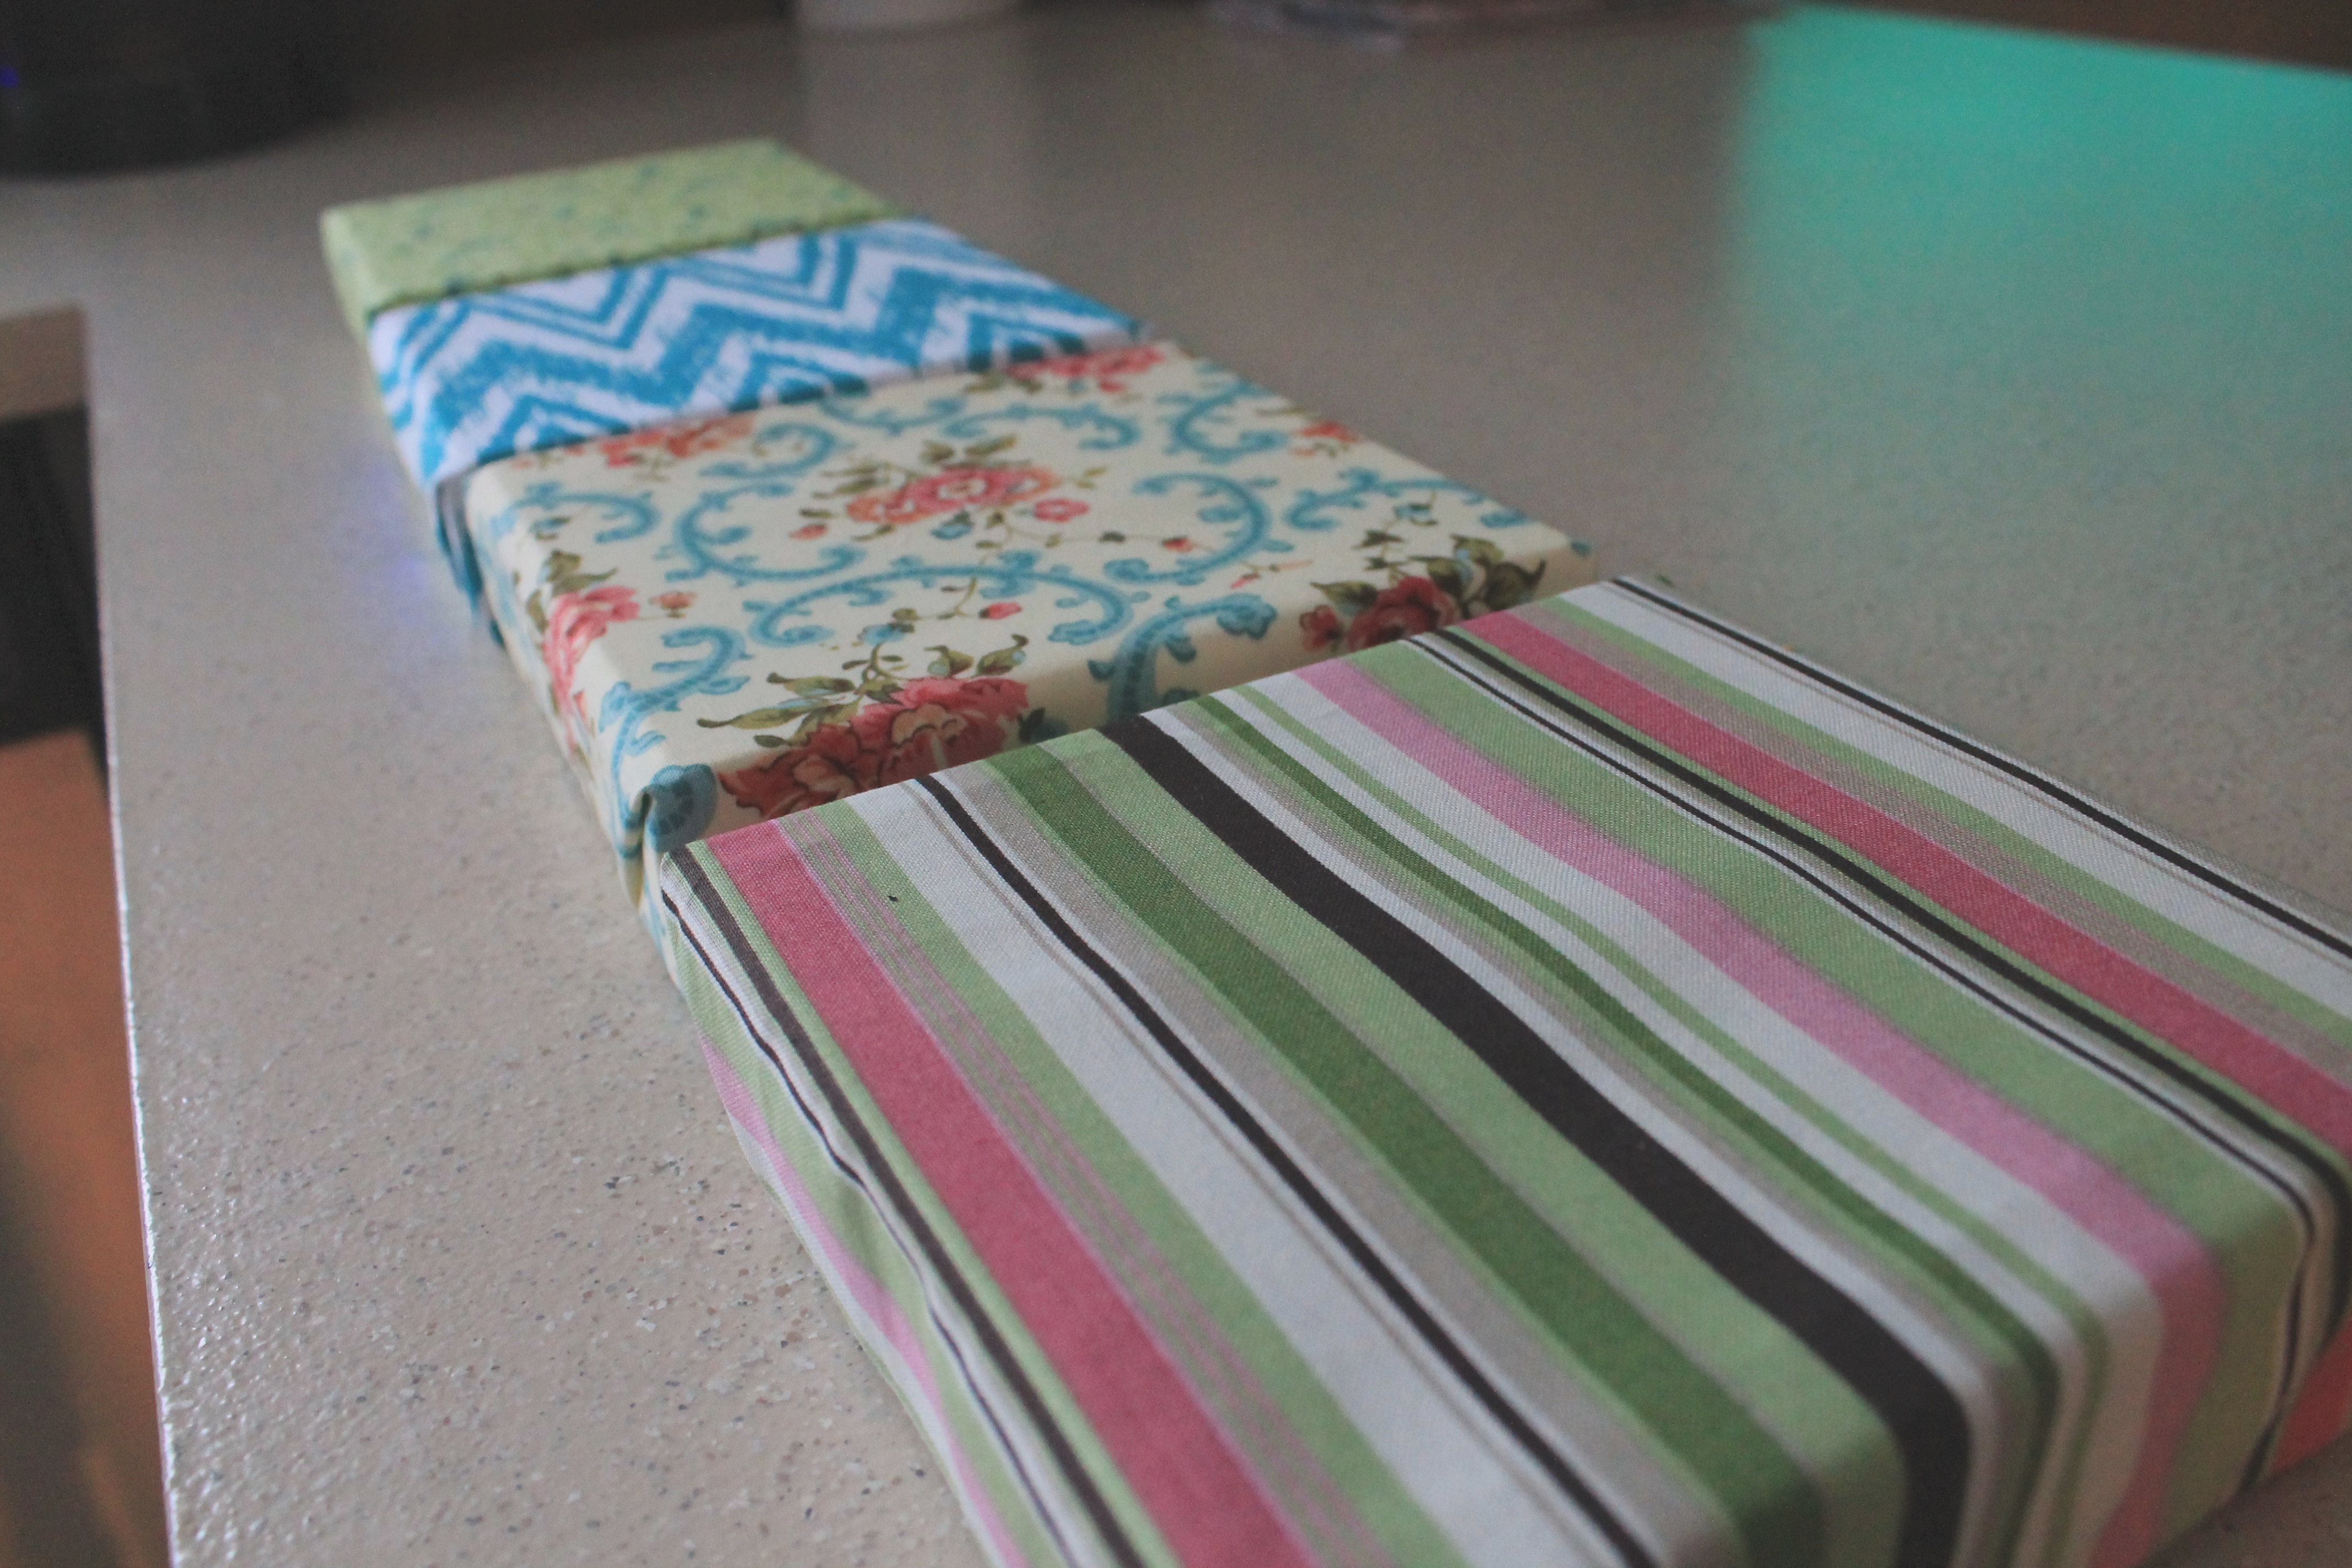
Ok, so this first one might not be the prettiest thing you’ve ever seen but hey, I’m totally winging this! Plus, it’s the back of the canvas, who cares! My second one went MUCH smoother. I found it easier to staple the inside fold then the outer fold. More staples but a cleaner look. It’s up to you! 

IMG_2811

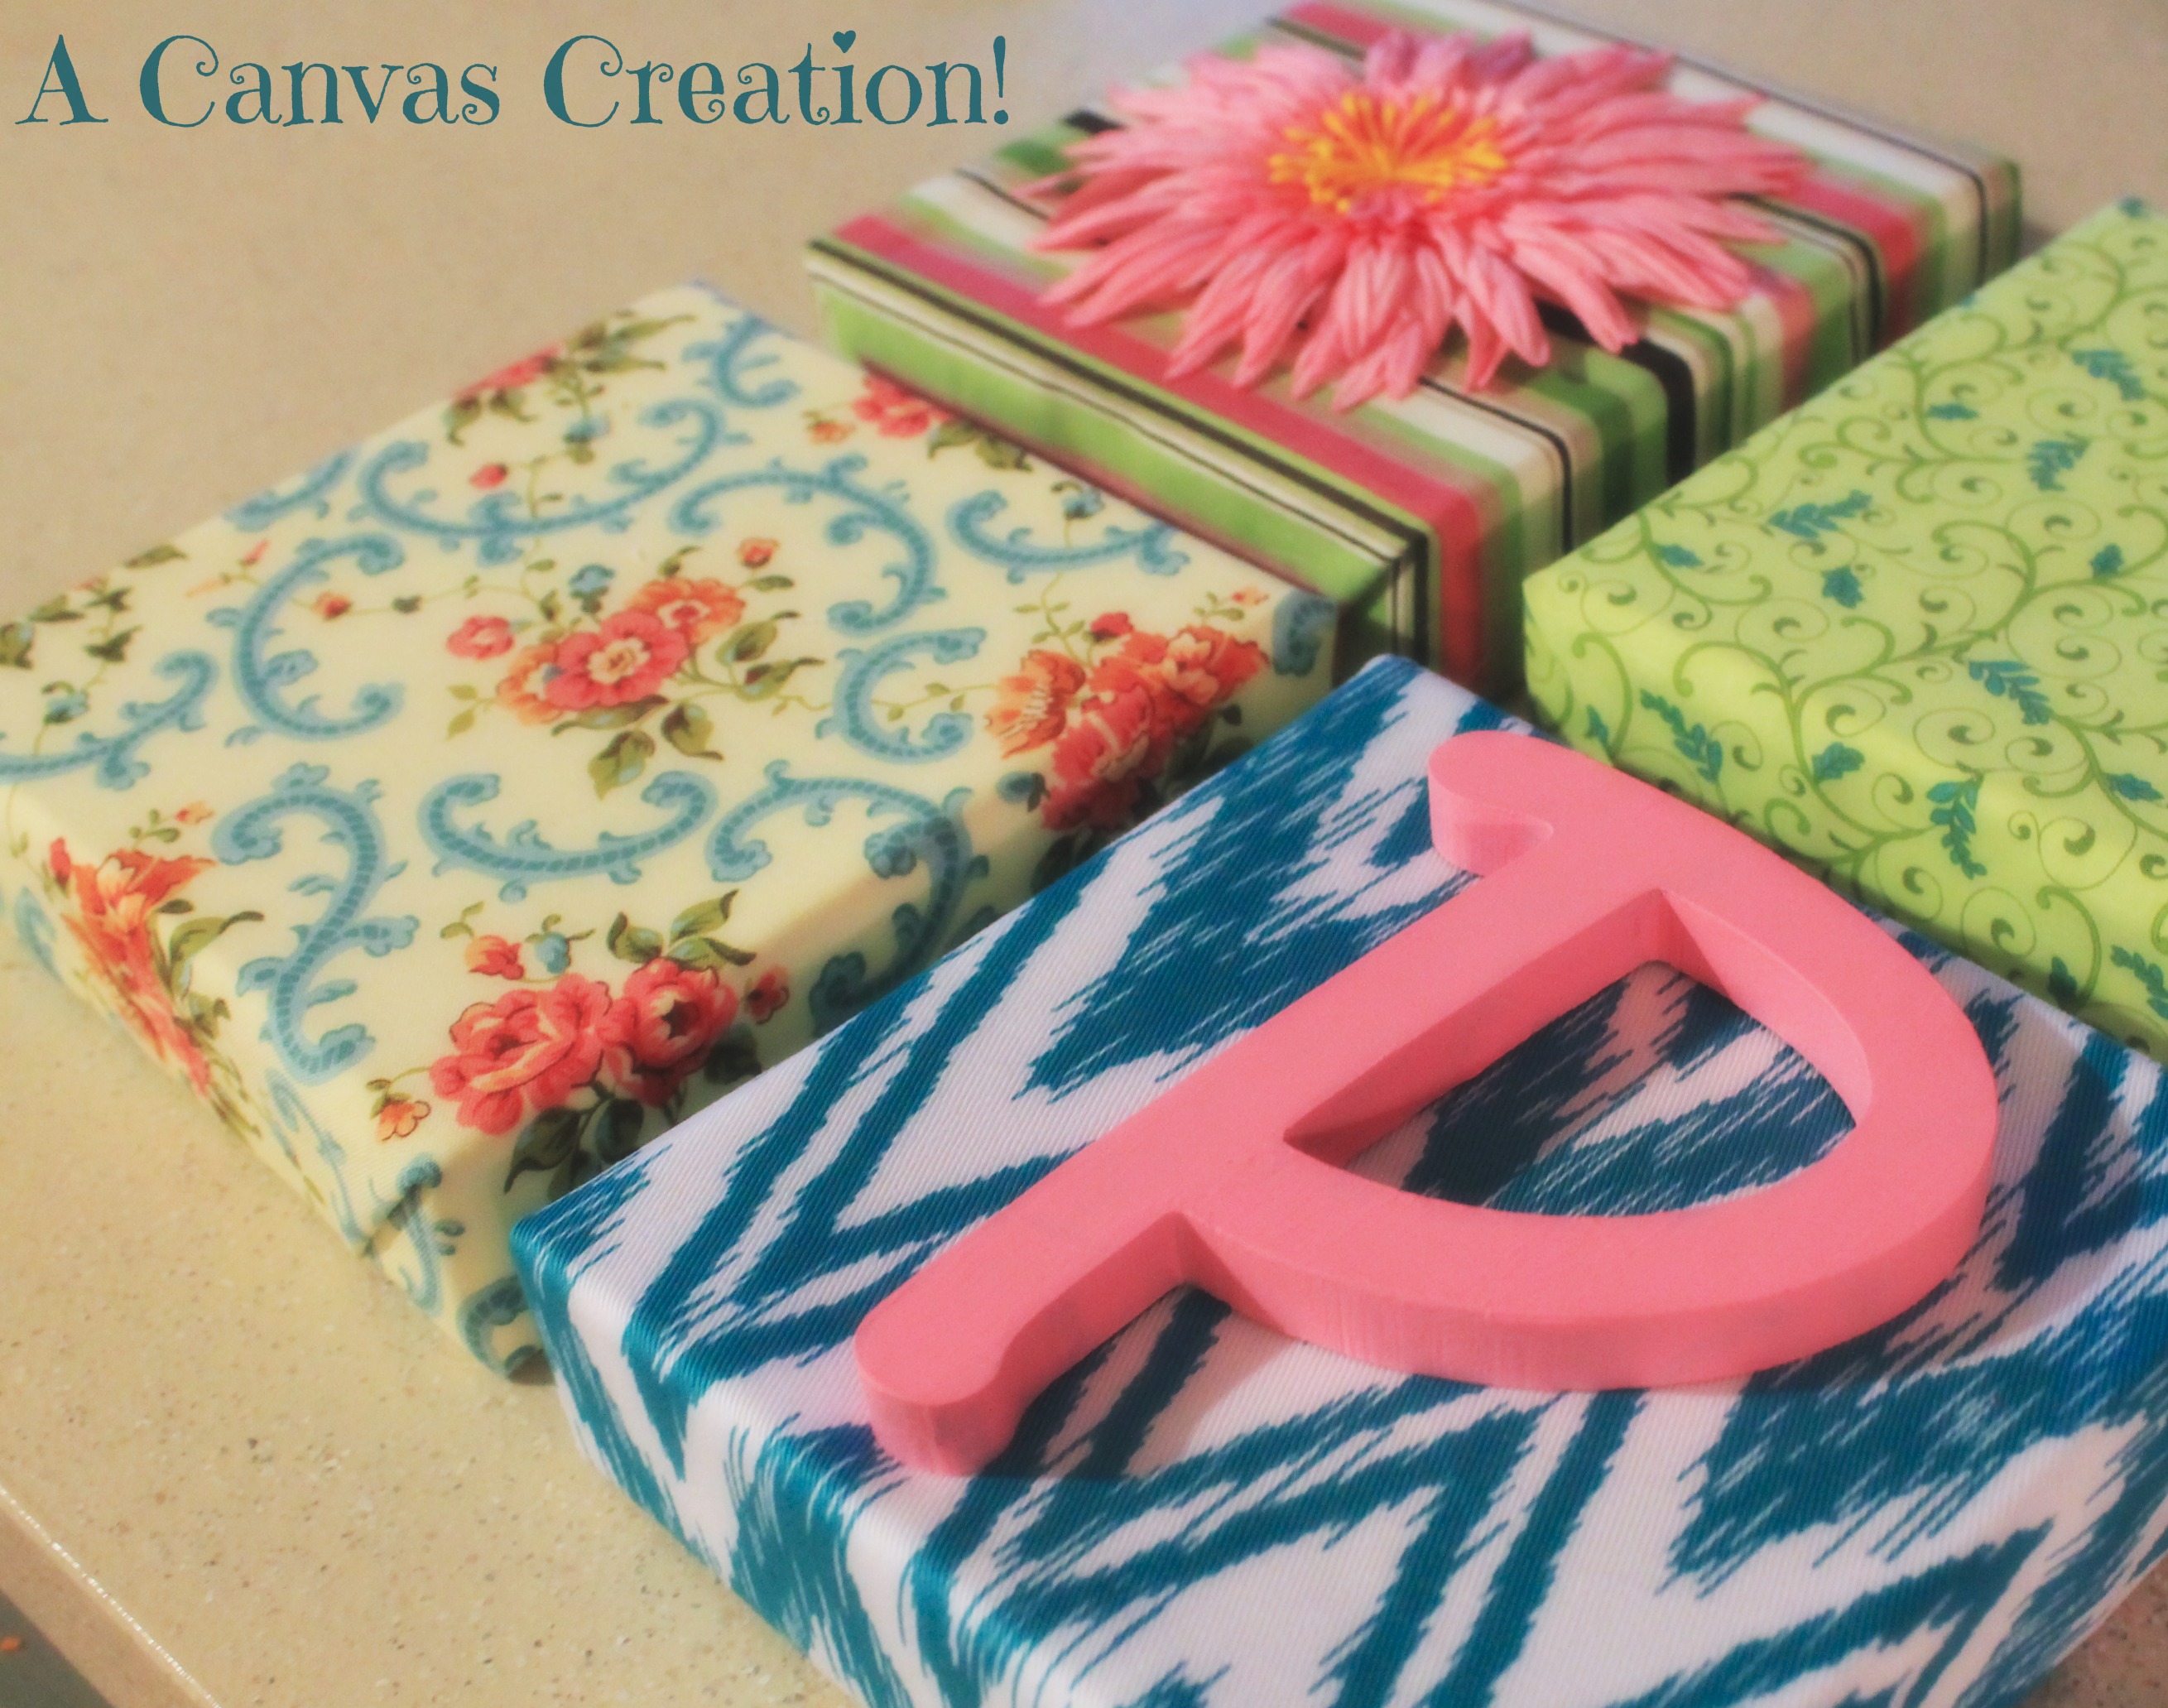
Once you’re finished you should have a smooth, clean and pretty little fabric covered canvas. Once finished with all four you’re ready to decorate! As you can see below, the first one is clearly the “demo”. I got a hang of it by the second, third and fourth. #ThankGod.

IMG_2810

IMG_2815

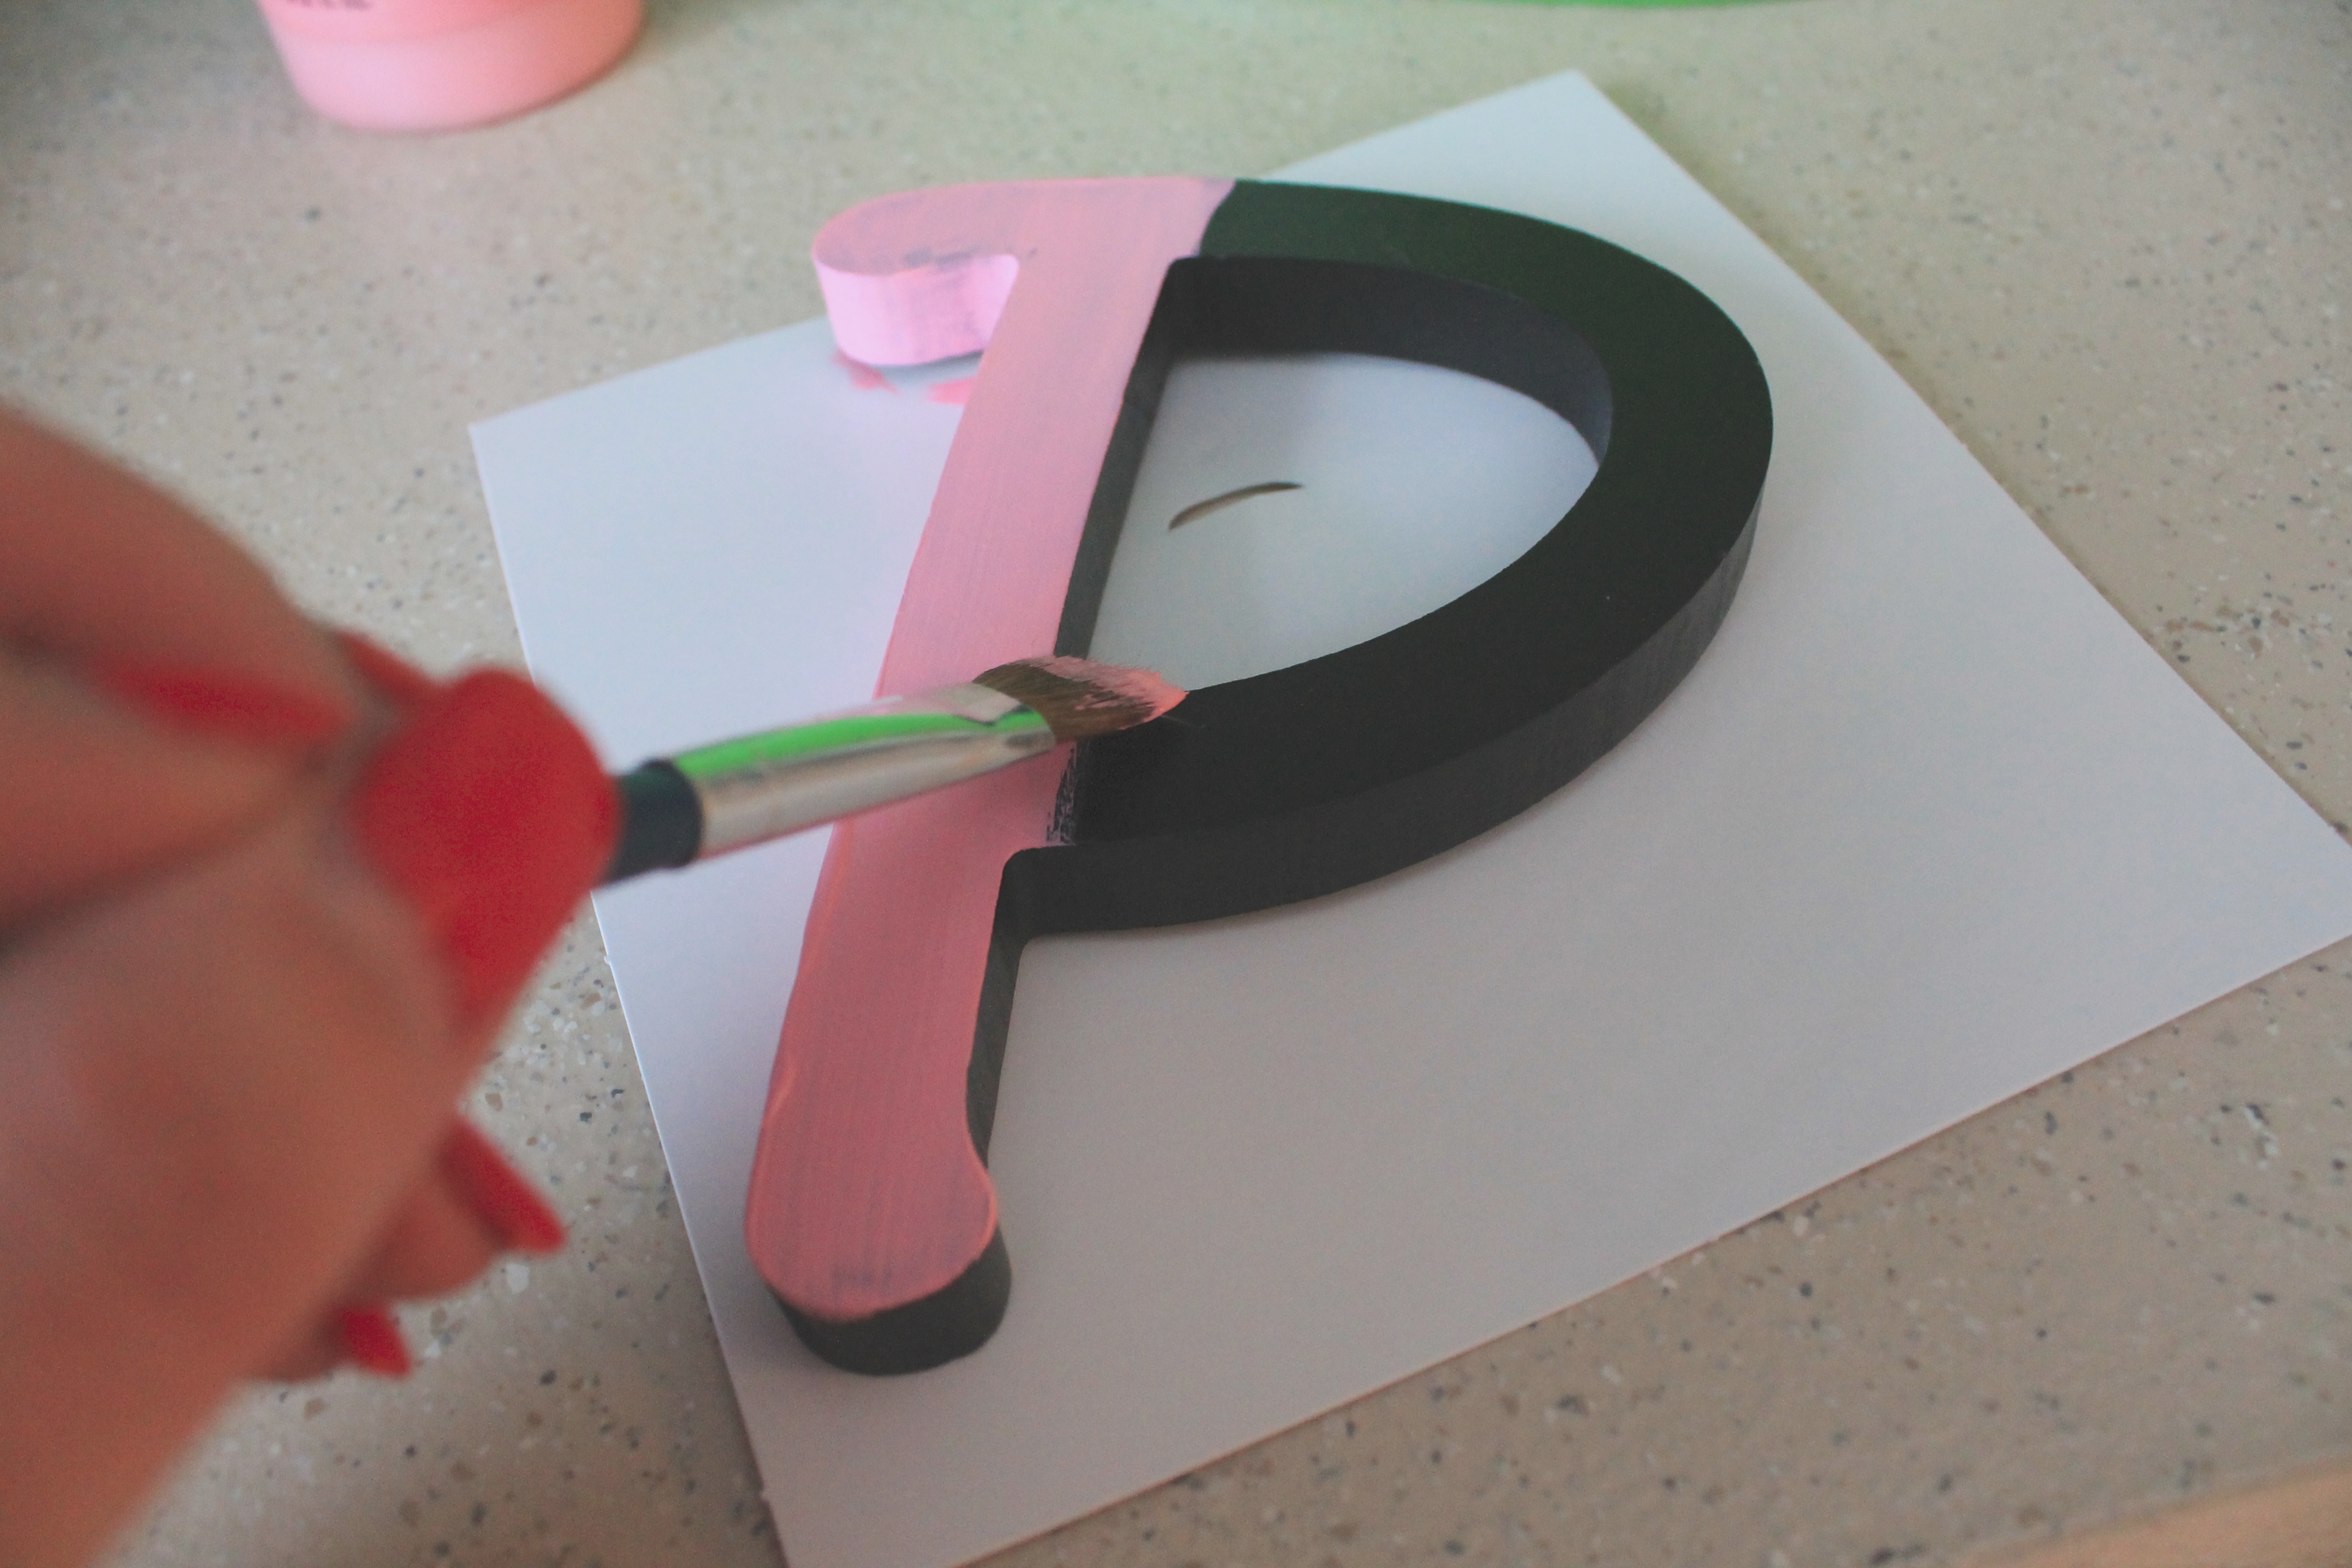
Step 4: Grab your wooden letter and start painting. (That is, IF you are painting said letter. You may want to leave it black or white or even wood, whichever it came in to begin with. I was stuck with black and was going for Pink so I had to bust out my paint collection! )

IMG_2817

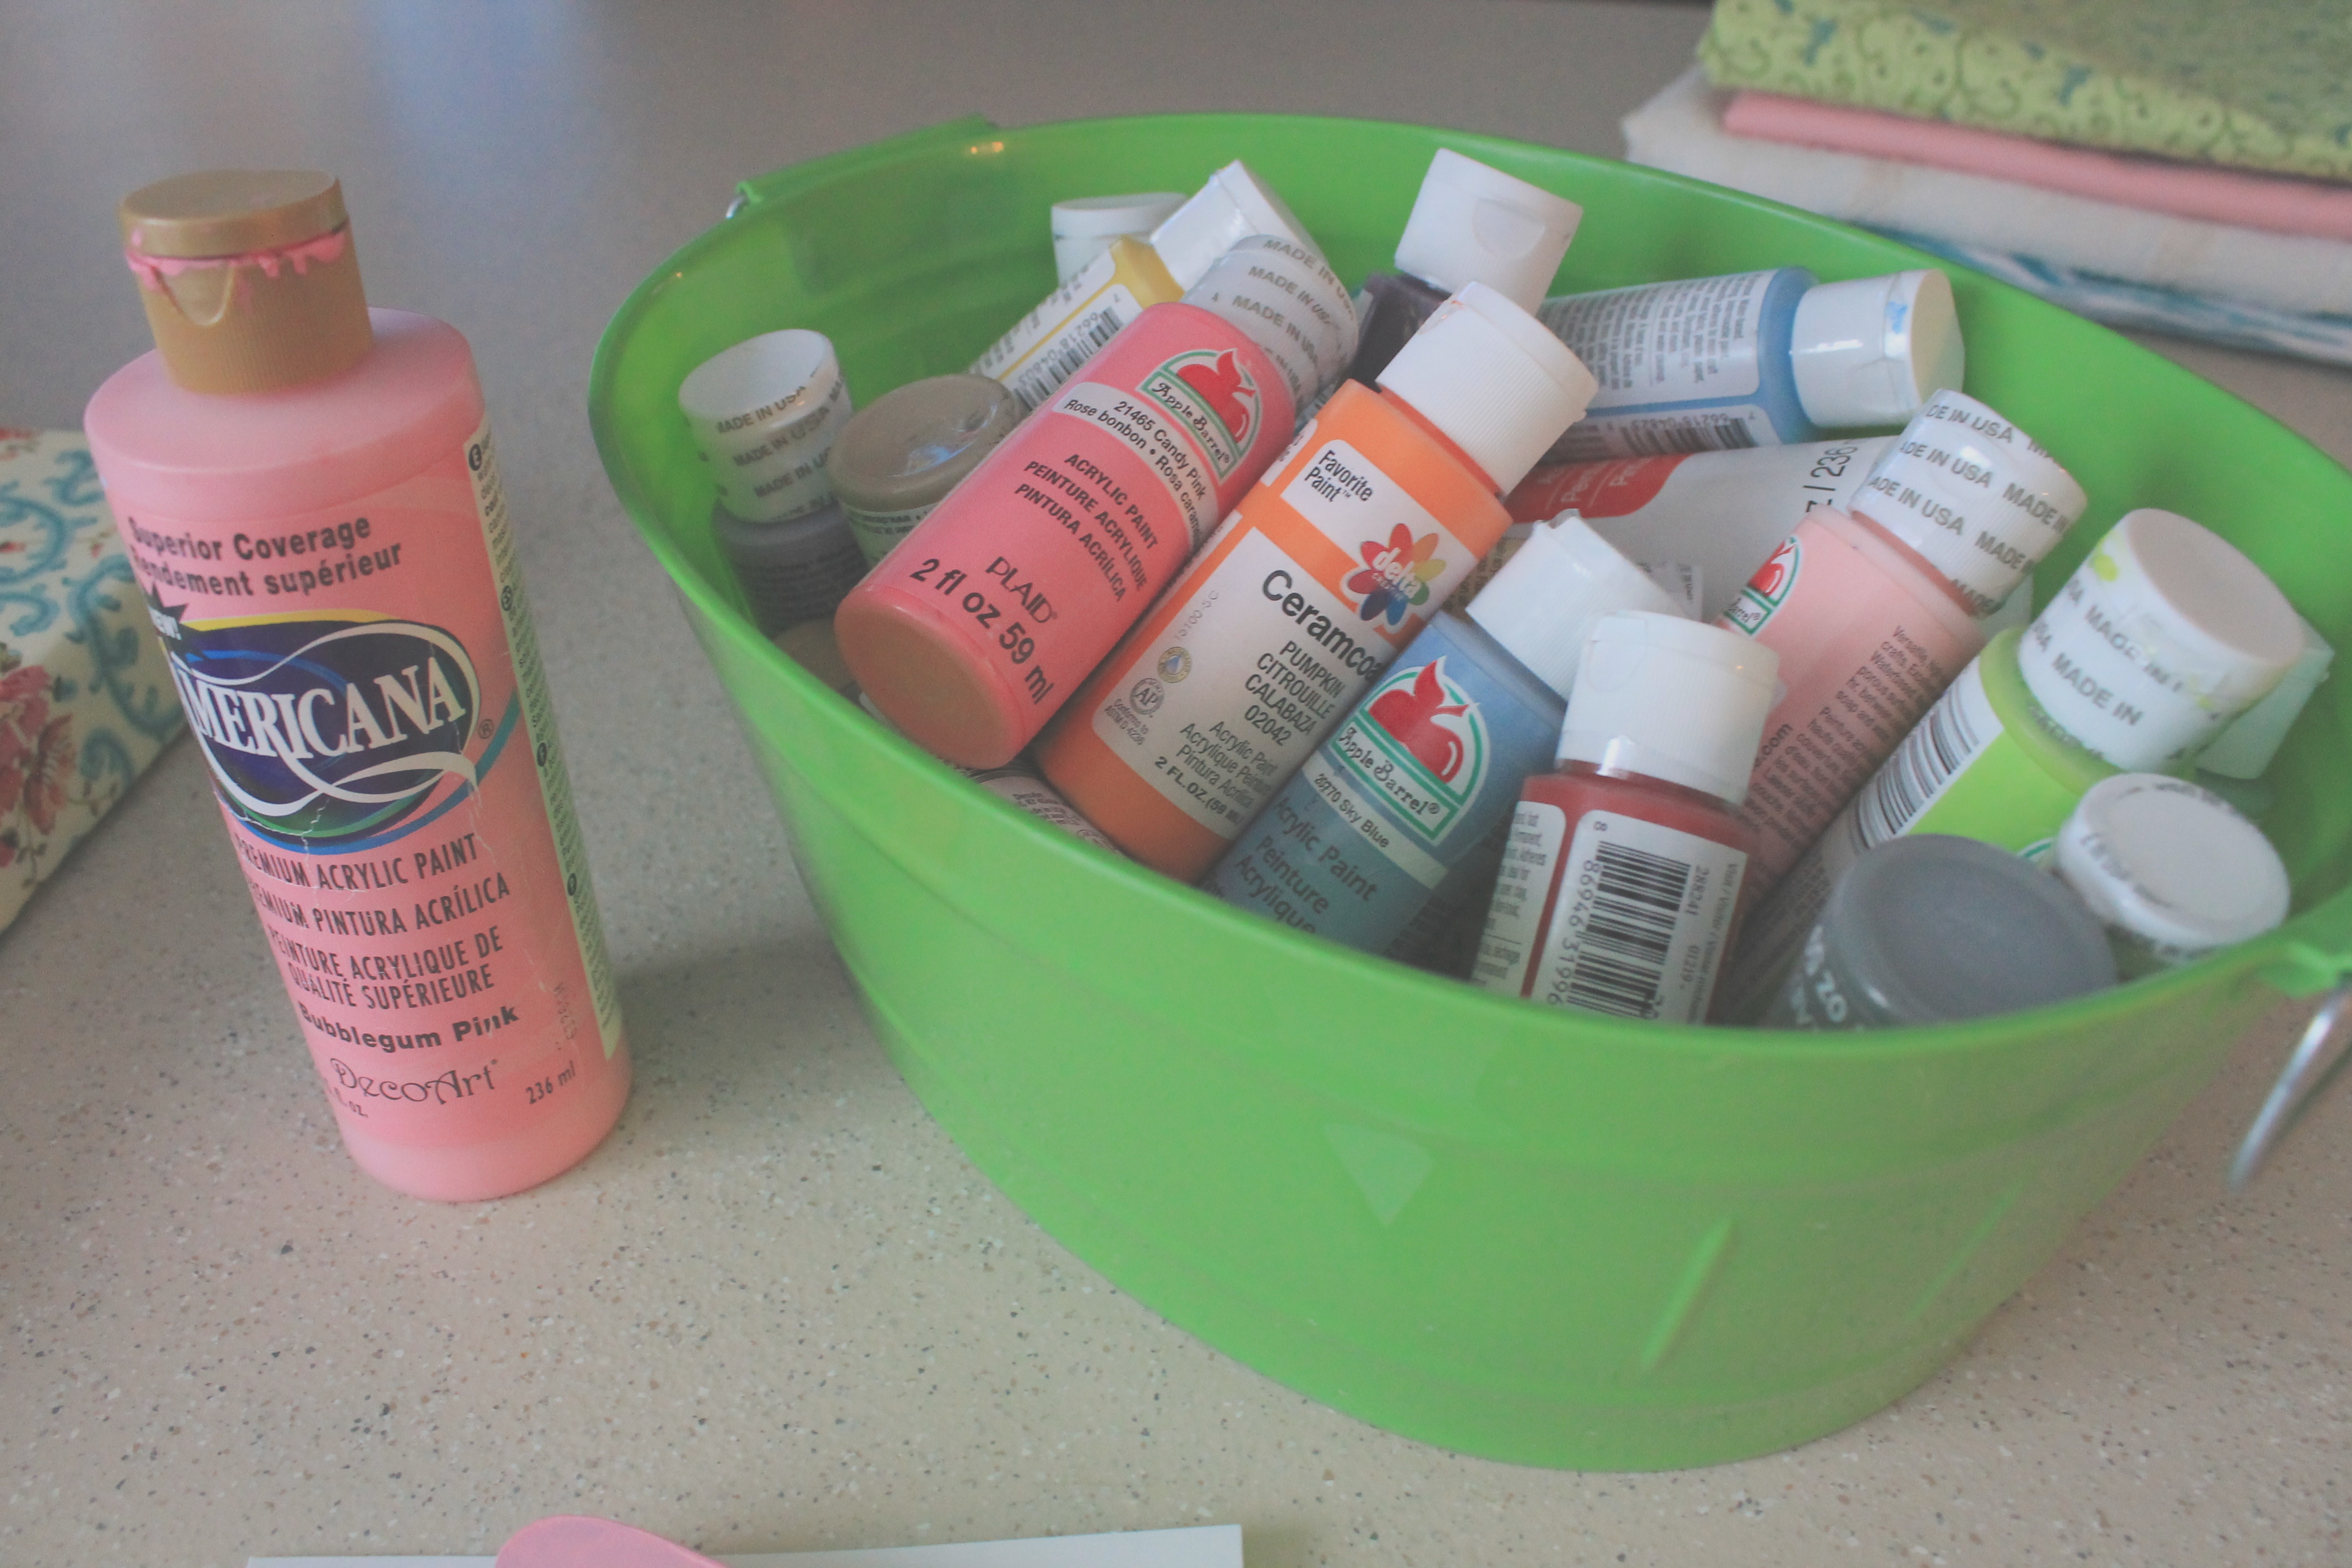
If you don’t already know, paint is typically wet for a while (Yes I just said that, you never know who’s reading) so lay your letter aside afterwards allowing time to dry. I use the cheap acrylic paints that take rarely more then 30 minutes to dry. If it helps, you may want to use a primer on black letters too (if that’s what you ended up with), as it didn’t cover with one coat. 

IMG_2819

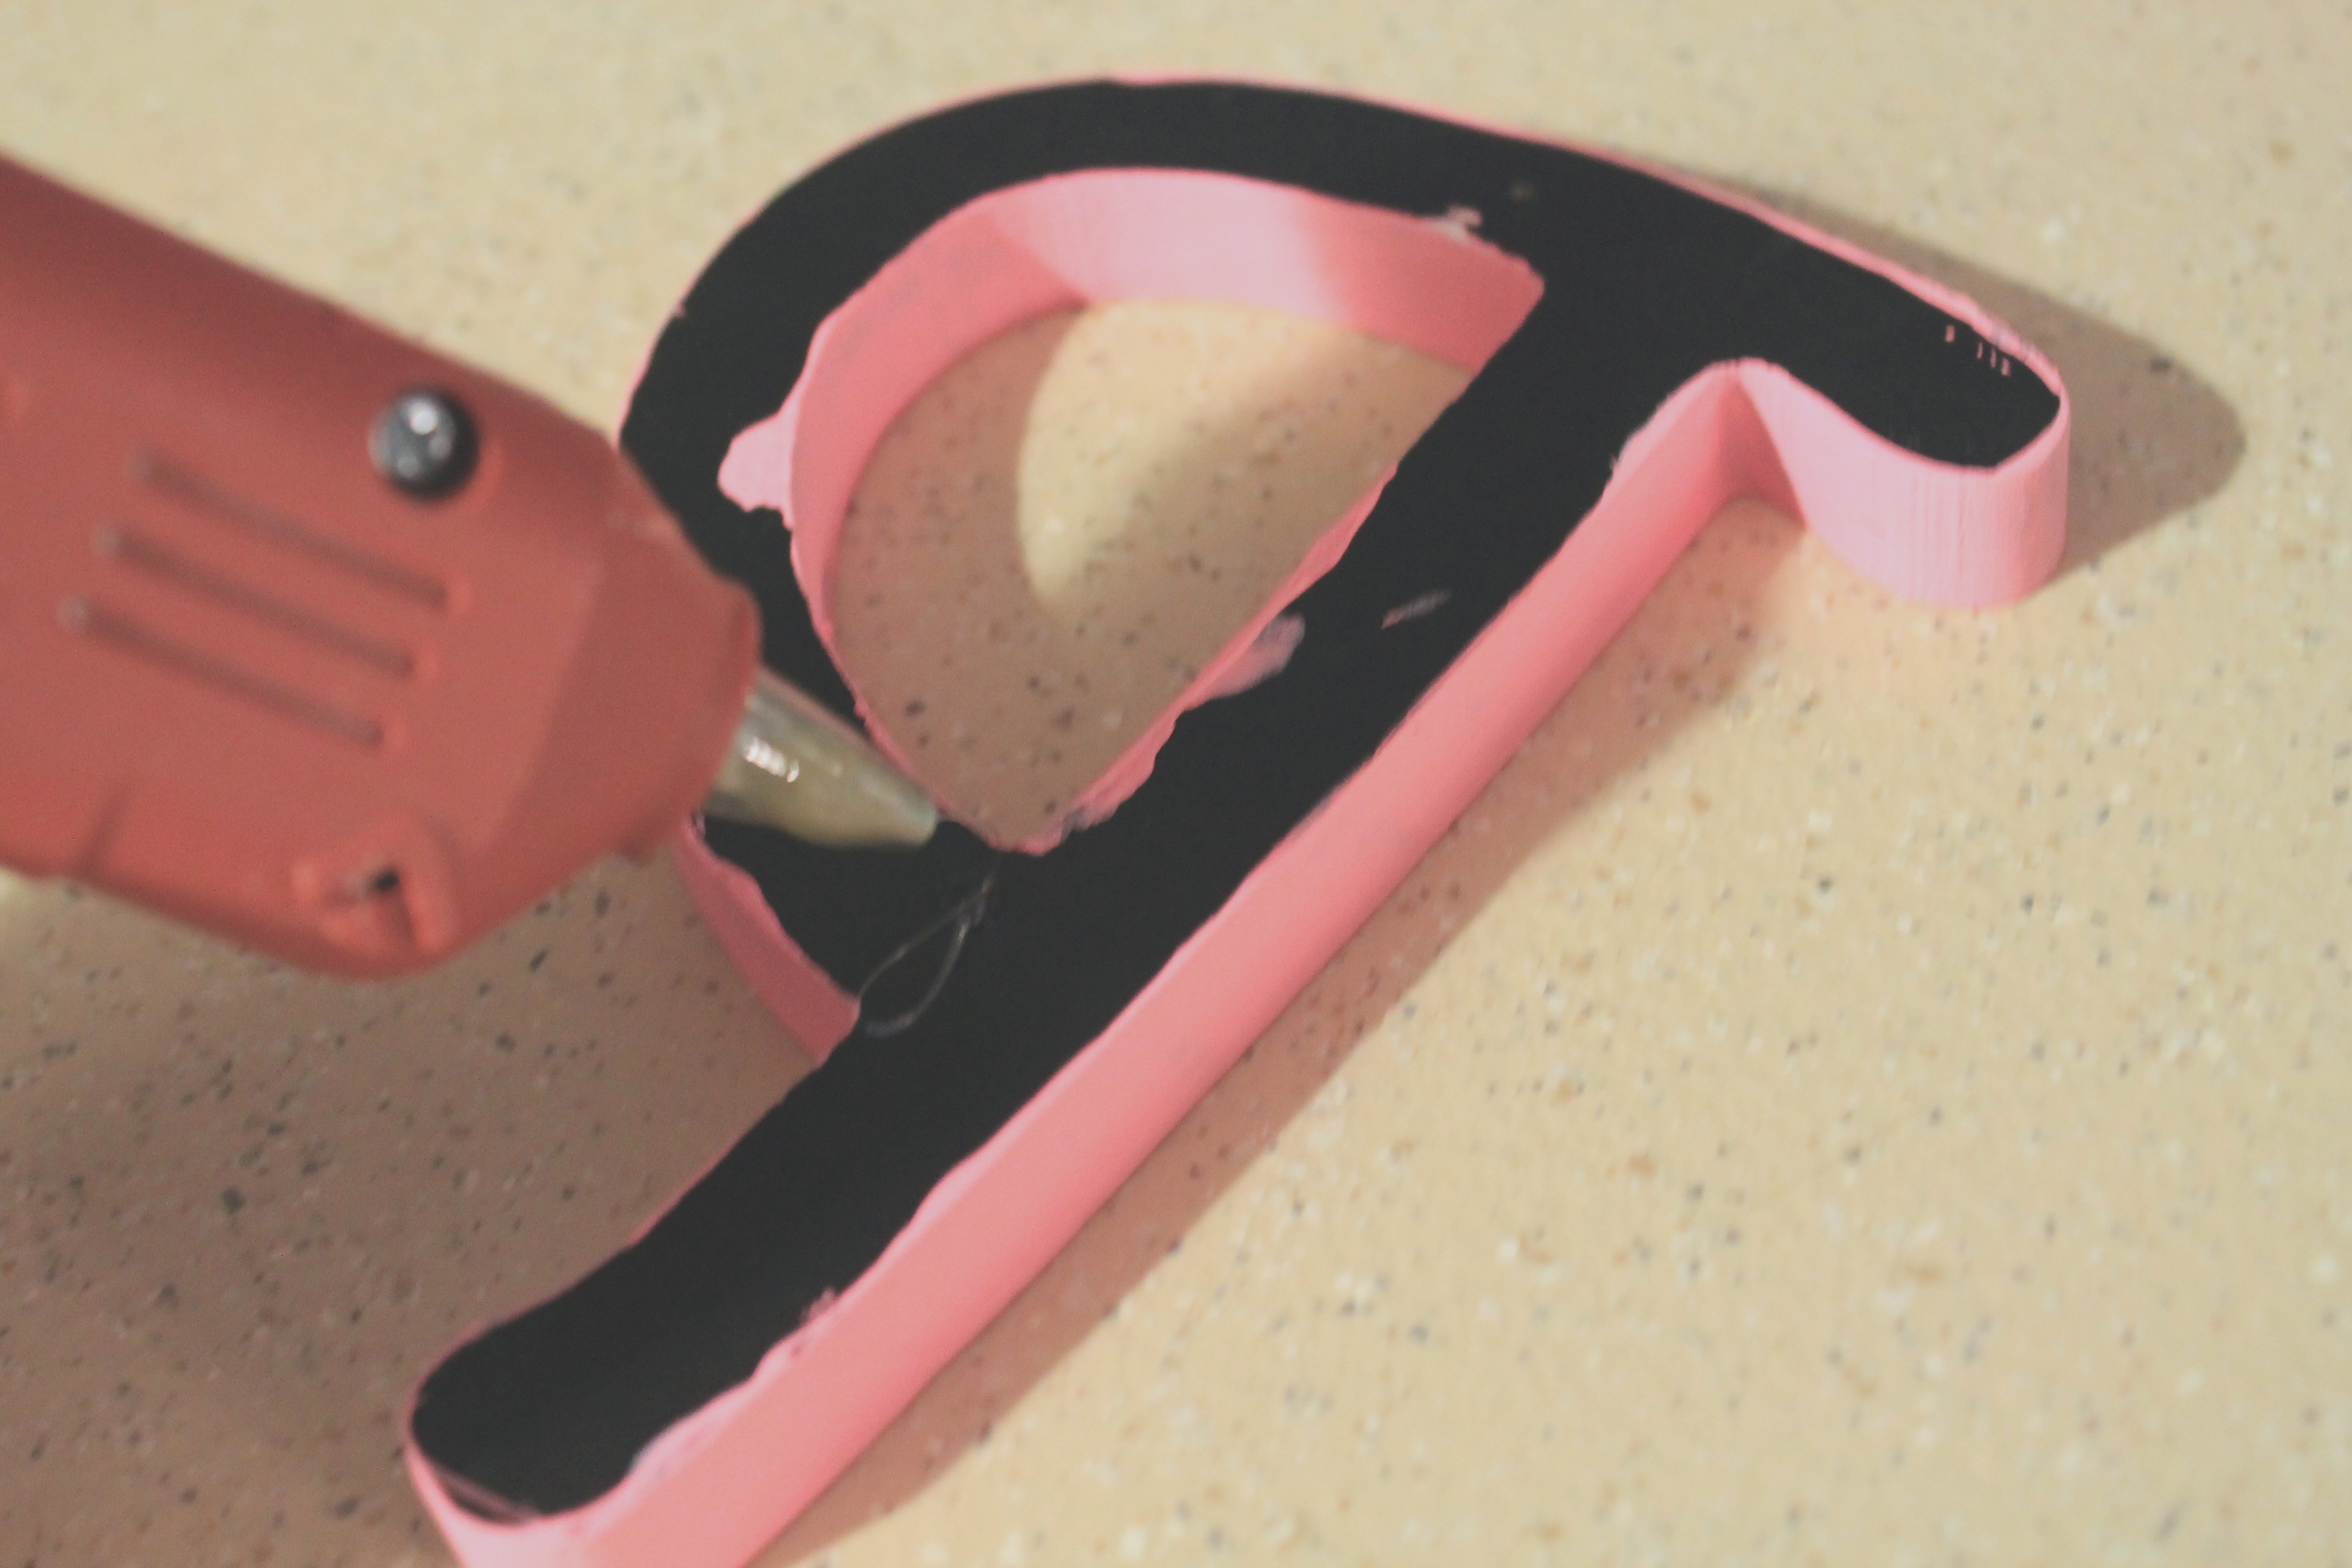
Step Five: Get to glueing! Make sure to heat up your hot glue gun and add whichever little details your heart desires. First, I glued the flower on. I had to remove a bit of hardware from the back before attempting to attach but it went on with no major issues. 

IMG_2823

IMG_2825

Next came the Letter P. I literally drenched the back of this thing in glue as I was afraid it wouldn’t stick. It stuck just fine, no worries here!! 

IMG_2827

IMG_2829

TADA!  There you have it, you’re done already. I hope it went as seamless for you as it did for me, this project really was a synch! Not to mention it’s adorable. Now I just have to decide whether to hang it in my Daughter’s room (Paige) or my new and colorful craft room! -Which I will totally blog about later, I’m in love with how it’s coming along!!) 

IMG_2833

So there you go, another project down in the books, another post to finally blog. I’m almost as proud that I’ve completed another post as I am that I completed the craft at hand. #TrueStory. I hope you enjoyed the project and that it’s something you yourself can re-create! Feel free to share your results and let me know, are there any projects you yourself have recently attempted?? 

Cheers!

– C

Gifts For The Grandparents *

So back before the holidays, I was on this kick of making sentimental gifts for close friends and family. . . while I should have probably gotten around to blogging about it then, I was too busy back-up shopping online in case these hypothetical gifts didn’t turn out as I imagined. To be honest I was quite surprised- I’m not such a hack after all!

I spent many a hour riffling through Pinterest boards and Blogs searching for some sort of inspiration when I landed on TipJunkie’s “14 Gifts For Grandparents” and decided to roll with it! I came across a few ideas I liked but one in particular stood out to me, #9- The Family Photo Display. The photo linked me back over to My Simple Obsession’s Blog where I found the simple and cute directions to create such a project- 

Family Spotlight Photo Display Tutorial

While I’ve always enjoyed the creativity behind a personal project, I can’t help but crave the challenge of completing an idea inspired by someone else. I like to know that I too, can do that! I too, am a somewhat crafty bitch! I too, can be a productive member of society! I also would like to take this chance to show Sarah, who created this project over at My Simple Obsession , that she is MUCH more talented than I but that I was, however, inspired by her post. I love her blog, it’s cute, simple and super fun. She’s got some great ideas so if you ever get the chance, go check it out! 

So anyhow, after looking over her post, I determined a few things that I may have to change or modify:

  1. Without one of those Cricut machines I was a lost soul. While I’m excellent at freehand lettering and I’m a huge fan of collecting stencils, I was in no way going to stack up against her perfected fonts. They are divine. I then moved on to adding the Cricut to my future Christmas List (It was too late of notice for this year, I didn’t want to be #thatwife.) Once adding it to the list, I surrendered to the idea that I would just have to utilize my stencils. . . and it wouldn’t be “perfect”. The end. 
  2. I wasn’t able to find the same size plaques at Michaels she lists in her post. I unfortunately was out shopping at the wrong time and they only had one left (I needed two – Both sets of Grandparents). I resorted to a lengthier and much more slender version they still had in stock. It wasn’t my favorite but it worked. . . . again settling. It’s tough for a perfectionist like myself but I’ve learned this whole act of “re-creating” other’s projects forces me to work with what I have, not with what I want. #BabySteps.
  3. I didn’t have her exact floral options but I did find some nice alternatives in the scrapbook section of Michaels. Or maybe it was the Martha Stewart section? (Is that a section? I don’t know.)
  4. I didn’t have the chance to run to Walmart for said “Burlap Ribbon” she lists in her supplies but I did however see some nice burlap looking ribbon at 70% off at checkout. #Score.
  5. I didn’t use eyelet screws, I used those micro mini nails I always find left over in the garage. . . I was totally scavenger hunting for the missing pieces to this project, not even going to lie. 
  6. I chose not to paint the plaque but instead, stain it. We stained our kitchen back splash with multiple stains over the summer and I had a ton left over, again rations. Also, I just love the look. 

Once I got home and I had collected all the supplies I would need for this project. . . . I began to plot my path to project perfection. Below is a list of all the items I acquired to complete the task at hand. While they differ slightly from Sarah’s post, I felt I could still accomplish my end goal. 

IMG_2609

Supplies:

  • Burlap Ribbon (Michaels)
  • Wooden Plaque (Michaels)
  • Mini Nails (2) 
  • Mini Clothespins (Michaels – come in a variety of colors!)
  • Hemp Twine (Walmart)
  • Paint Marker (Michaels – One Black, One White)
  • Hot Glue Sticks
  • Hot Glue Gun
  • Floral Decoration (Of your choosing) 
  • Staple Gun 
  • Stains (Home Depot – Of your choosing)

Step One: Stain the plaques. I used a variety of english wood, black and an old barn grey. They created a dirty, rustic brown. I couldn’t decide on an exact color so I just kept adding layers of all of them. . . .5 layers to be precise and NO, you don’t have to do this. You can more then happily just buy one stain you prefer and do one or two layers until you get the desired effect.  

IMG_2599

Make sure to wipe off each layer of stain after you apply it. This was important for me to know as I was a first time stainer myself. . . .luckily the hubby had some good experience before our kitchen backsplash “project” as you can see in the background. (He did such a good job, all the wood turned out different shades and I instantly fell back in love. . . with our kitchen. DUH!)

IMG_2598

Once they are done being stained (and wiped down) the plaque should look something like this. . . (See Above). Let these dry for the next 24 hours before attempting to complete the project. Also, DO THIS OUTSIDE. I made the mistake of attempting it on our kitchen counter. The house smelled for days, not to mention if it gets on ANYTHING it could be totally destroyed. I got lucky on that one but seriously, just take it from me. OUTSIDE. 

IMG_2605

Step Two: Lettering. This requires a stencil of your choice and your paint markers. You can use actual paint if you prefer but the paint markers make it incredibly easy! I pick them up at the craft store all the time! The phrase goes: GRANDKIDS  (Large Font Above) – Make Life More Grand (Small Font Below).

IMG_2613

Once finished with step two you should have a pretty little outcome such as this. . . .(See Below). I know it’s not Cricut perfect but hey, it was a $4 solution to a $150+ Cricut dilemma. Side Note: I was following the examples on My Simple Obsession’s post so closely that I committed the exact same grammatical disaster Sarah warned us NOT to do. That’s what I get for just following the pictures #ChildAtHeart. Regardless – It’s MAKE not MakeS. I did however realize my error before completing the second plaque. . . (remember I’m making two – one for each set of Grandparents), in case you missed that part. So that’s good. 

IMG_2616

Step Three: Involves those little nails I was telling you about, or eyelet screws, or whatever you yourself may have purchased (or found on your garage floor like me). Basically line them up along the bottom Right and Left corners level to one another. 

IMG_2620

I personally just eye-balled it but whatever it is you prefer, be my guest. Some people are more anal than others. Personally, I’m not really into that. . . . #I’veGotJokes. Oh, and if I didn’t mention it before, you need a hammer. 

IMG_2618

Step Four: Attaching the hemp twine. It’s pretty simple really, just tie the hemp to each nail and make sure it’s rather taught. If it isn’t, your photos will sag once you hang them. If that’s the look you’re going for then by all means, slip it some slack! 

IMG_2625

Step Five: Attach those cute little flowers you’ve been waiting to use! First off, remember to heat up your hot glue gun! (I always forget that step in everything, go to squeeze out glue. Boom! No glue. Also, really hard to squeeze.) Once your gun is heated, put a little glue on the back of each flower and place them wherever you please! 

IMG_2627

I went for the paper flowers as opposed to the fabric option that Sarah’s blog mentioned. I honestly didn’t have a preference I just happened to come across these first while creeping the craft store and I liked the colors. Fabric would be cute too, these were just more my style. 

IMG_2628

Step Six: Attach the ribbon. Take your burlap ribbon and cut two equally length pieces then staple them to the back of your plaque. I personally tied the bow first THEN stapled it to the plaque. This helped me to make sure the bow was equally centered, . . . at least my brain thinks so. 

IMG_2636

Step Seven: Take those cute little clothespins you’ve collected and get to pinning! This was my favorite step as I’m OBSESSED with all things Mini. I also loved selecting which pins I wanted to use as Michaels had SO many cute colors I never had expected. 

IMG_2633

& finally, you’re finished! Well minus adding the photos. I personally added pictures of our little Paige before I gave them as gifts but I mistakenly forgot to photograph them before I gave them away as gifts! Sometimes it slips my mind I’m actually going to blog all of this. . . I’m learning. Slowly. But regardless, below is the final product! 

IMG_2646

It’s so cute! (Although I must say it was even cuter when I added my little munchkin’s snap shots! It was the perfect gift for the grandparents. My in-laws even hung it in their living room, a place that no child has ever landed before in the history of the Scally household. #ProudMoment! 

So in closing I would just like to thank Sarah over at My Simple Obsession for providing me such a wonderful idea and challenging me to create something meaningful for the Grandparents! So tell me, which projects have challenged you? I would love to hear your thoughts and especially projects you’ve tackled. . . as I may try them myself! 

Cheers!

– C

Gifts for the Girls *

So this holiday season has been a bit of a stretch on the wallet. With tying the knot in May, 8 weddings to finish the 2013 season, 30+ Bach/Bachelorette & Showers, a remodeled kitchen and the significant setback of placing our daughter in Montessori, it’s been one hell of a year! Simply put, we are broke! And no, we aren’t eating Ramen every night but I’m not out buying myself the latest Prada either. (AS IF I ever was before!) HA. We are getting by for now but this process has definitely got me thinking outside the box….. But through my obsession with Pinterest, Etsy and my ability to think up a craft over a simple cup of tea, I’ve decided that this year my best girlfriends are getting a simple yet personal gift of my choosing!

Along with the help of some simple computer skills, (and trust me when I say simple) a little patience for downloading some outrageously fun fonts, and a Costco Membership I have come up with the idea to create a chalkboard poster with out all the excessive chalk paint and additional expenses! As I am a HUGE fan of the rustic/vintage themes lately. *Our entire wedding was rustic everything. . . . I have compromised authentic with creative and come up with a thoughtful gift I hope they will truly enjoy. 

obligated to love what i made you

You see, my two best friends, Heather & Rachel ( & Dual Maid of Honors),  just recently moved in together. Roommates since college, I sometimes still pine for the days we could watch One Tree Hill and eat movie theatre popcorn in between classes. (Yes Heather would literally stop at the movie theatre on her way home just to purchase a large popcorn. . . . No she wasn’t high.) No responsibilities and zero motivation, it was a magical time. To be honest I can’t say I even watched any of their shows. . . I was never much of a TV person growing up but I loved to sit in the room and interrupt the most important points in each episode. . . . I’m sure anyone that knows me is not in any way shocked by this. In all actuality, I was a late bloomer when it came to watching addictive television. It hit me around age 25 when I was on maternity leave, right about the time when everyone on planet earth had placed the shows I was just starting in the category of “that’s so last decade”. . . . due to a little bug I caught called NetFlix. I mean honestly, have you people ever tried to watch just ONE episode of Grey’s Anatomy on that thing, OR Gossip Girl for that matter?? It’s like one episode just rolls right into the other, it’s impossible to get off the train. A whole new world for me. . . or a lack there of. I’m not entirely sure.

Regardless, Once we graduated we all went our separate ways. Heather moved off to San Diego after college and Rachel stayed at home in Rochester pursuing careers in the automotive arena. I stuck out the introduction of this Great Recession in the bar for another year following graduation only to land myself a marketing career in the greater Detroit area where I met my husband and began my life as it is today. While we grew in distance we grew closer as friends. . . .With my wedding on the way, Heather was spending an awful lot of time and $$money$$ flying back and forth for the special occasion. A Mitten Lover at heart, Heather made the decision to make her move back home just after my nuptials. It was the greatest of news and I like to think my wedding made this happen! 3 years on the West Coast was FAR too long for me and Rachel to go with out. After some last minute moves, the girls settled into their house in Royal Oak and we’ve been making an effort to spend more time together ever since. 

DSC_6137

Rachel – Me – Heather

When Heather first moved home, we hoped to make her transition as easy as possible. We knew she was giving up an awful lot back in California to come here and while we wanted to jump up and down in excitement, we in no way wanted to diminish what she may be experiencing as she left her friends and career behind. This Christmas gift was actually inspired from the initial gift I gave Heather when she moved home. As a way of making her move a little lighter, I printed a Subway Art poster for her of all the most important places in San Diego. 

Screen Shot 2013-12-11 at 4.33.46 PM

After a lot of thought and creative digging, I came up with the idea to create a chalkboard design with a framed, finished feeling. I started by searching for the perfect backdrop. . . .Google. It’s as simple as that. I typed in “Chalk Board Back Drop” and tada! A thousand options. My advice is to look at the pixels and measurements and look for the largest option photo possible as this wont blur or distort when you go to stretch as a background. Below is my favorite option. It has a little dusty finish, a truly authentic feel:

chalk-background.jpg

Now me personally, I’m an Apple girl at ♥. I have the obvious experience with Office as I think it’s somewhat essential in this day and age but with a Graphic Artist for a father, we never owned a PC a day in our lives. I’d like to keep it that way. While I have recently acquired the entire Adobe Suite, I have yet to really master it. . . . so this little project will be put together in Pages. For those of you unfamiliar with the program, it can be easily done in Word as well. To start I chose a 16”x 20″ page setting and stretched this fantastic chalkboard to reach each edge. (Adjust your margins to 0″.) I decided on a 16″x20″ layout because I will be printing these off at Costco. For the amazing price of $5.99 you can print a 16’x20″ photo on a lustre finish that’s the perfect touch for any piece of framed art. Not too matted but just enough shine, it’s a fantastic service and I LOVE the Costco Photo Center. So fast and always spot on!  

Once the background was in place, it’s just a matter of creating your own design. I stuck with a similar layout for each girl but substituted fonts and words in each piece of work. Next, I downloaded SO many FREE Fonts from a variety of sites. You can google Free Font sites but from personal experience, I recommend getting on Pinterest and searching “free fonts”. You’ll be amazed at what you can come up with. I found so many fun fonts, especially for a chalky feel. I must have spent 2 hours just downloading fonts. . . . This was by far the most time consuming portion of this project. (By the way you in NO way have to spend that much time or download as many fonts as I did. I just couldn’t help myself. . . I’m a freak like that!) Make sure to check out my pinned fonts here. Also, some of my favorite Chalkboard Fonts I found on the fantastic blog: The36thAvenue.com . She had some Excellent Fonts that I used in this project.

*Some of my personal font favorites are: Return To Sender, Scribble Box, Dirty Cursive, and Chalk Line Outline. I also love the font Broken Hearts for cutesy little heart images that can really accent a project! ( I do a lot of prints for weddings so this in turn is a GREAT font for me.). 

After I decided on fonts and what not (obviously the most important part of this post!!), I simply would insert a text box for each word I wanted to use to describe the girls. I would resize each box to fit the desired space, use a multitude of type sizes, fonts, etc. and then finish it off by making each word White as to appear the color of chalk on a board. . . . the finished product turned out a little something like this!

Heather's Chalkboard Poster

!!AHHHH!! 

Rachel's Chalkboard Poster

I can’t express how excited I am to get these printed! I think they turned out so fantastic and can hardly wait to find the perfect white frames to finish them off. Upon finishing such a project I can honestly say that my imagination is running absolutely wild. I can’t stop thinking of the next best print I can come up with! If you’ve had a chance to check out my Etsy site, you will see that I had previously designed some rustic prints for your special day but now that I’ve created this personal gift, I can’t wait to craft, craft, craft! Have you crafted any gifts this season?? IF so PLEASE Share!

*SideNote: Any recommendations on Netflix shows you have enjoyed? I am always looking for the next best show! (Even if it is 10 years ago!!) HaHa Thanks!! 🙂 

Cheers,

– C