So back before the holidays, I was on this kick of making sentimental gifts for close friends and family. . . while I should have probably gotten around to blogging about it then, I was too busy back-up shopping online in case these hypothetical gifts didn’t turn out as I imagined. To be honest I was quite surprised- I’m not such a hack after all!
I spent many a hour riffling through Pinterest boards and Blogs searching for some sort of inspiration when I landed on TipJunkie’s “14 Gifts For Grandparents” and decided to roll with it! I came across a few ideas I liked but one in particular stood out to me, #9- The Family Photo Display. The photo linked me back over to My Simple Obsession’s Blog where I found the simple and cute directions to create such a project-
Family Spotlight Photo Display Tutorial
While I’ve always enjoyed the creativity behind a personal project, I can’t help but crave the challenge of completing an idea inspired by someone else. I like to know that I too, can do that! I too, am a somewhat crafty bitch! I too, can be a productive member of society! I also would like to take this chance to show Sarah, who created this project over at My Simple Obsession , that she is MUCH more talented than I but that I was, however, inspired by her post. I love her blog, it’s cute, simple and super fun. She’s got some great ideas so if you ever get the chance, go check it out!
So anyhow, after looking over her post, I determined a few things that I may have to change or modify:
- Without one of those Cricut machines I was a lost soul. While I’m excellent at freehand lettering and I’m a huge fan of collecting stencils, I was in no way going to stack up against her perfected fonts. They are divine. I then moved on to adding the Cricut to my future Christmas List (It was too late of notice for this year, I didn’t want to be #thatwife.) Once adding it to the list, I surrendered to the idea that I would just have to utilize my stencils. . . and it wouldn’t be “perfect”. The end.
- I wasn’t able to find the same size plaques at Michaels she lists in her post. I unfortunately was out shopping at the wrong time and they only had one left (I needed two – Both sets of Grandparents). I resorted to a lengthier and much more slender version they still had in stock. It wasn’t my favorite but it worked. . . . again settling. It’s tough for a perfectionist like myself but I’ve learned this whole act of “re-creating” other’s projects forces me to work with what I have, not with what I want. #BabySteps.
- I didn’t have her exact floral options but I did find some nice alternatives in the scrapbook section of Michaels. Or maybe it was the Martha Stewart section? (Is that a section? I don’t know.)
- I didn’t have the chance to run to Walmart for said “Burlap Ribbon” she lists in her supplies but I did however see some nice burlap looking ribbon at 70% off at checkout. #Score.
- I didn’t use eyelet screws, I used those micro mini nails I always find left over in the garage. . . I was totally scavenger hunting for the missing pieces to this project, not even going to lie.
- I chose not to paint the plaque but instead, stain it. We stained our kitchen back splash with multiple stains over the summer and I had a ton left over, again rations. Also, I just love the look.
Once I got home and I had collected all the supplies I would need for this project. . . . I began to plot my path to project perfection. Below is a list of all the items I acquired to complete the task at hand. While they differ slightly from Sarah’s post, I felt I could still accomplish my end goal.

Supplies:
- Burlap Ribbon (Michaels)
- Wooden Plaque (Michaels)
- Mini Nails (2)
- Mini Clothespins (Michaels – come in a variety of colors!)
- Hemp Twine (Walmart)
- Paint Marker (Michaels – One Black, One White)
- Hot Glue Sticks
- Hot Glue Gun
- Floral Decoration (Of your choosing)
- Staple Gun
- Stains (Home Depot – Of your choosing)
Step One: Stain the plaques. I used a variety of english wood, black and an old barn grey. They created a dirty, rustic brown. I couldn’t decide on an exact color so I just kept adding layers of all of them. . . .5 layers to be precise and NO, you don’t have to do this. You can more then happily just buy one stain you prefer and do one or two layers until you get the desired effect.

Make sure to wipe off each layer of stain after you apply it. This was important for me to know as I was a first time stainer myself. . . .luckily the hubby had some good experience before our kitchen backsplash “project” as you can see in the background. (He did such a good job, all the wood turned out different shades and I instantly fell back in love. . . with our kitchen. DUH!)

Once they are done being stained (and wiped down) the plaque should look something like this. . . (See Above). Let these dry for the next 24 hours before attempting to complete the project. Also, DO THIS OUTSIDE. I made the mistake of attempting it on our kitchen counter. The house smelled for days, not to mention if it gets on ANYTHING it could be totally destroyed. I got lucky on that one but seriously, just take it from me. OUTSIDE.

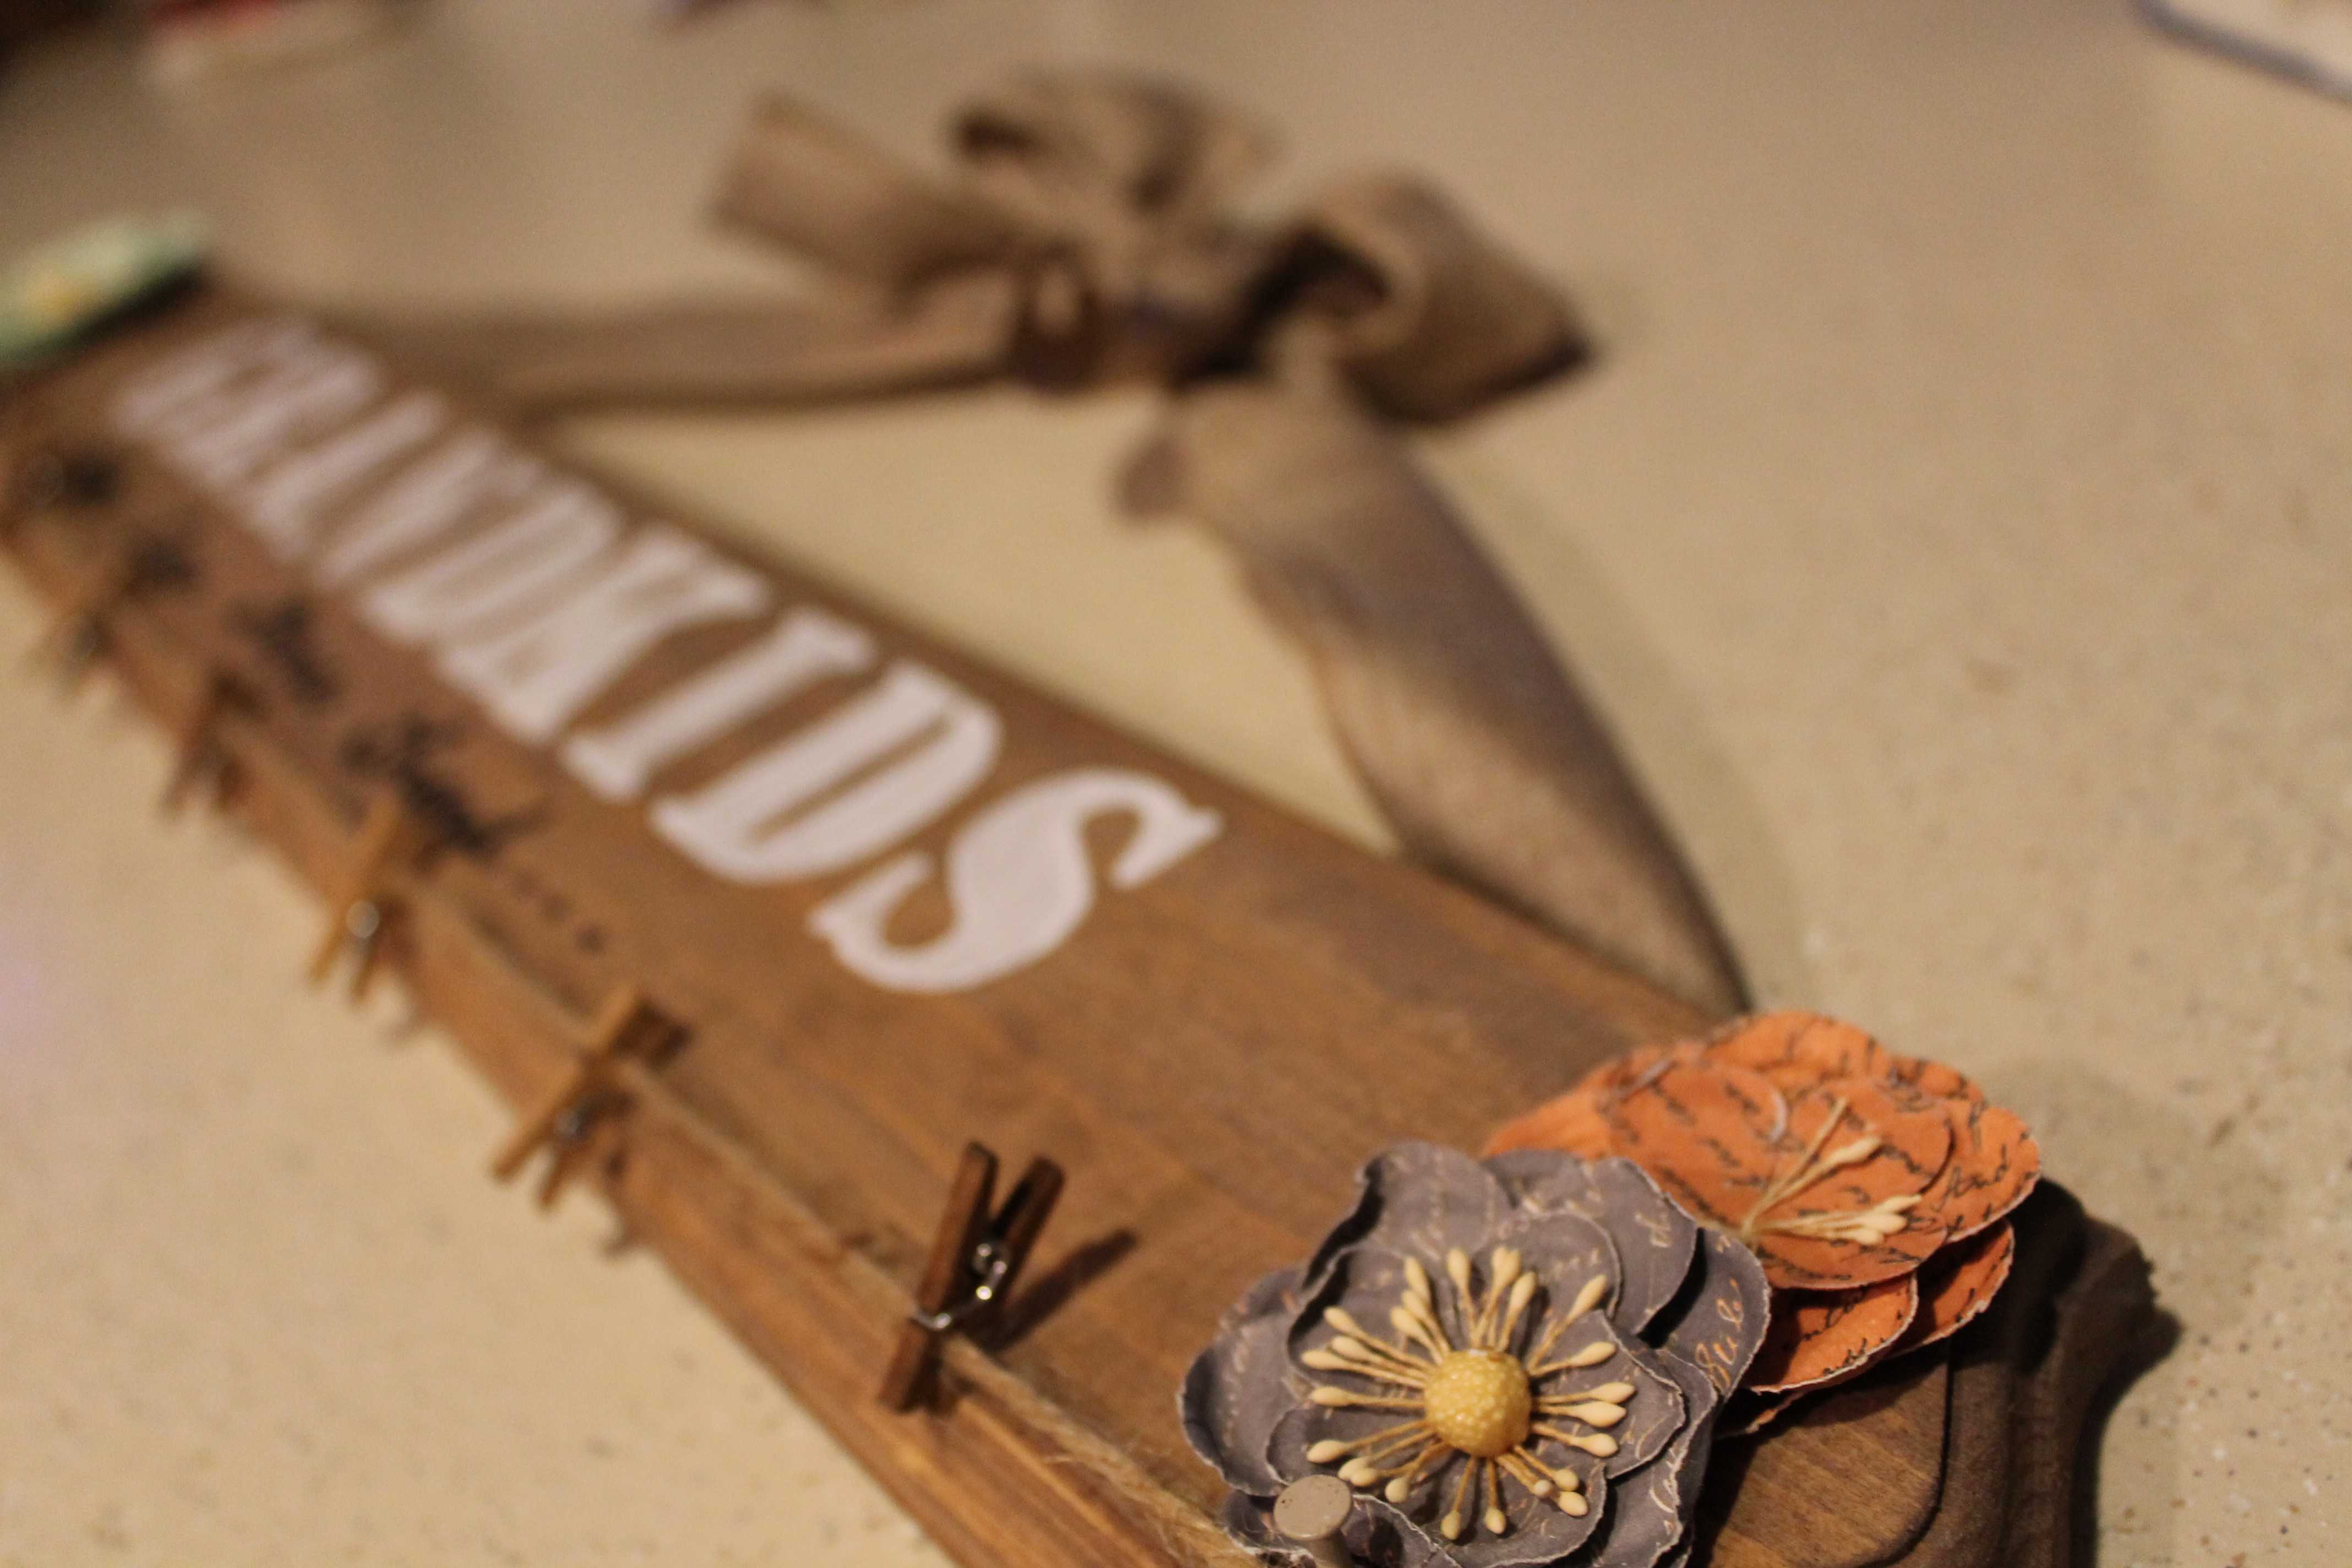
Step Two: Lettering. This requires a stencil of your choice and your paint markers. You can use actual paint if you prefer but the paint markers make it incredibly easy! I pick them up at the craft store all the time! The phrase goes: GRANDKIDS (Large Font Above) – Make Life More Grand (Small Font Below).
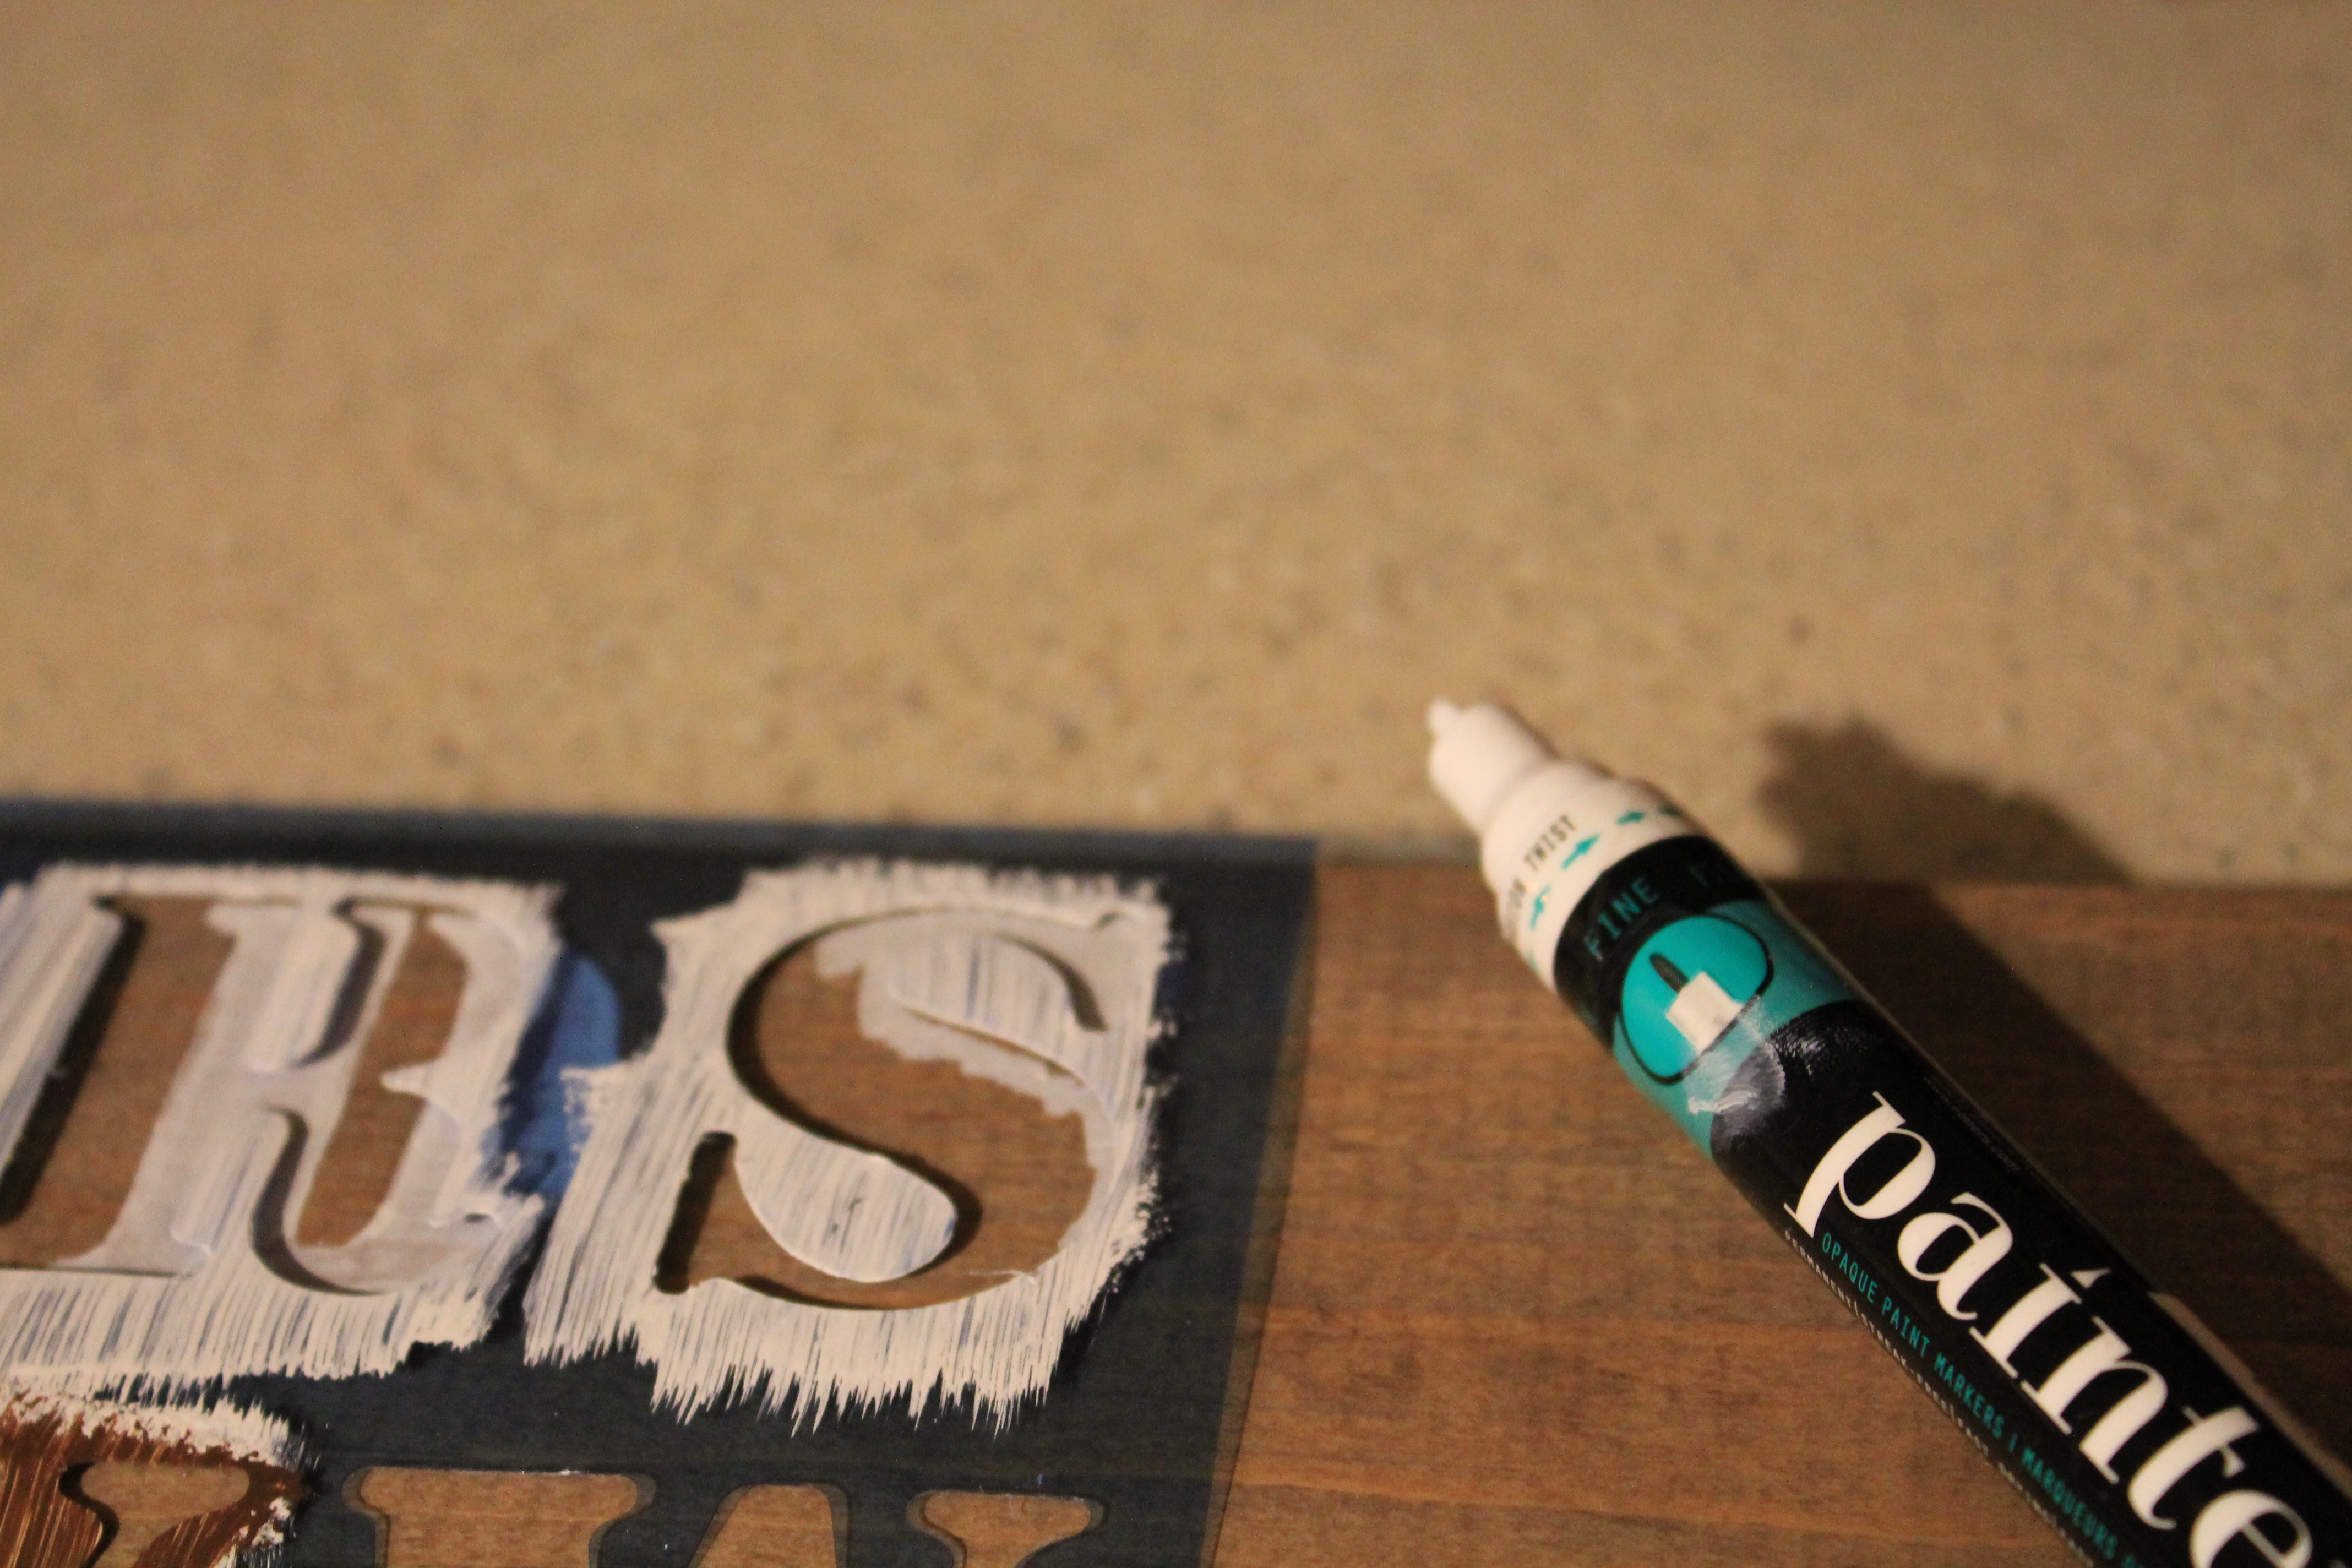
Once finished with step two you should have a pretty little outcome such as this. . . .(See Below). I know it’s not Cricut perfect but hey, it was a $4 solution to a $150+ Cricut dilemma. Side Note: I was following the examples on My Simple Obsession’s post so closely that I committed the exact same grammatical disaster Sarah warned us NOT to do. That’s what I get for just following the pictures #ChildAtHeart. Regardless – It’s MAKE not MakeS. I did however realize my error before completing the second plaque. . . (remember I’m making two – one for each set of Grandparents), in case you missed that part. So that’s good.

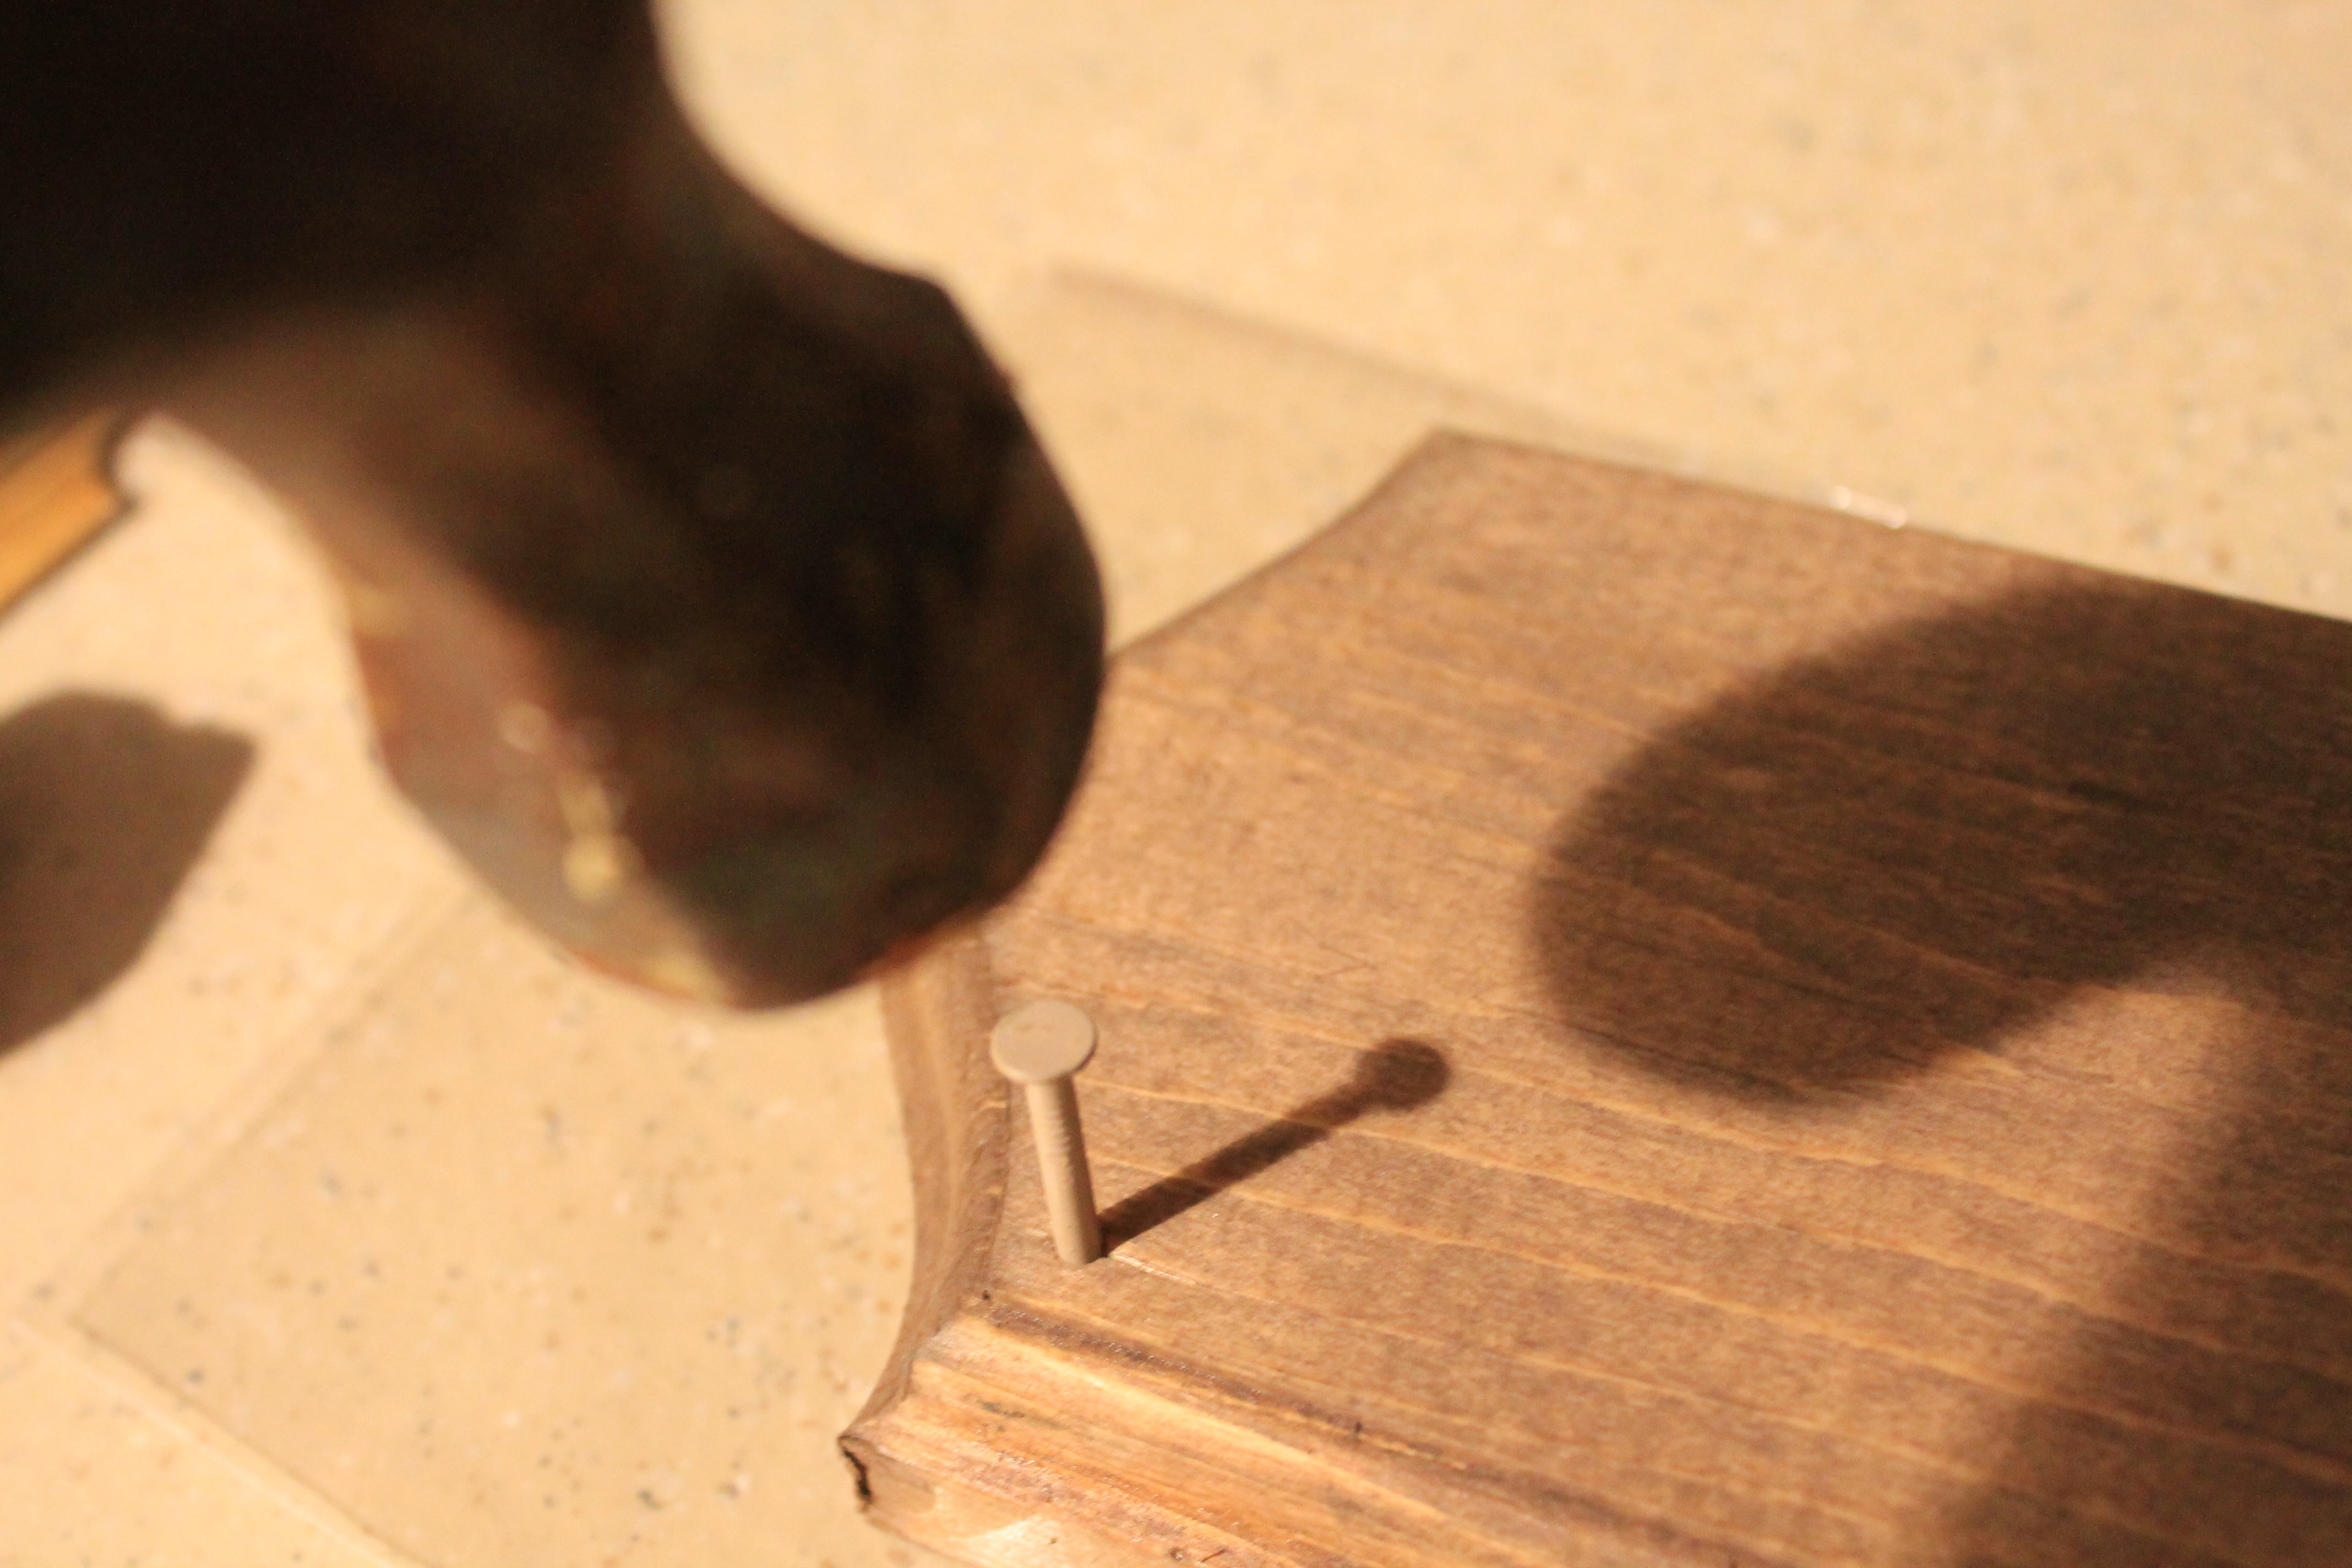
Step Three: Involves those little nails I was telling you about, or eyelet screws, or whatever you yourself may have purchased (or found on your garage floor like me). Basically line them up along the bottom Right and Left corners level to one another.
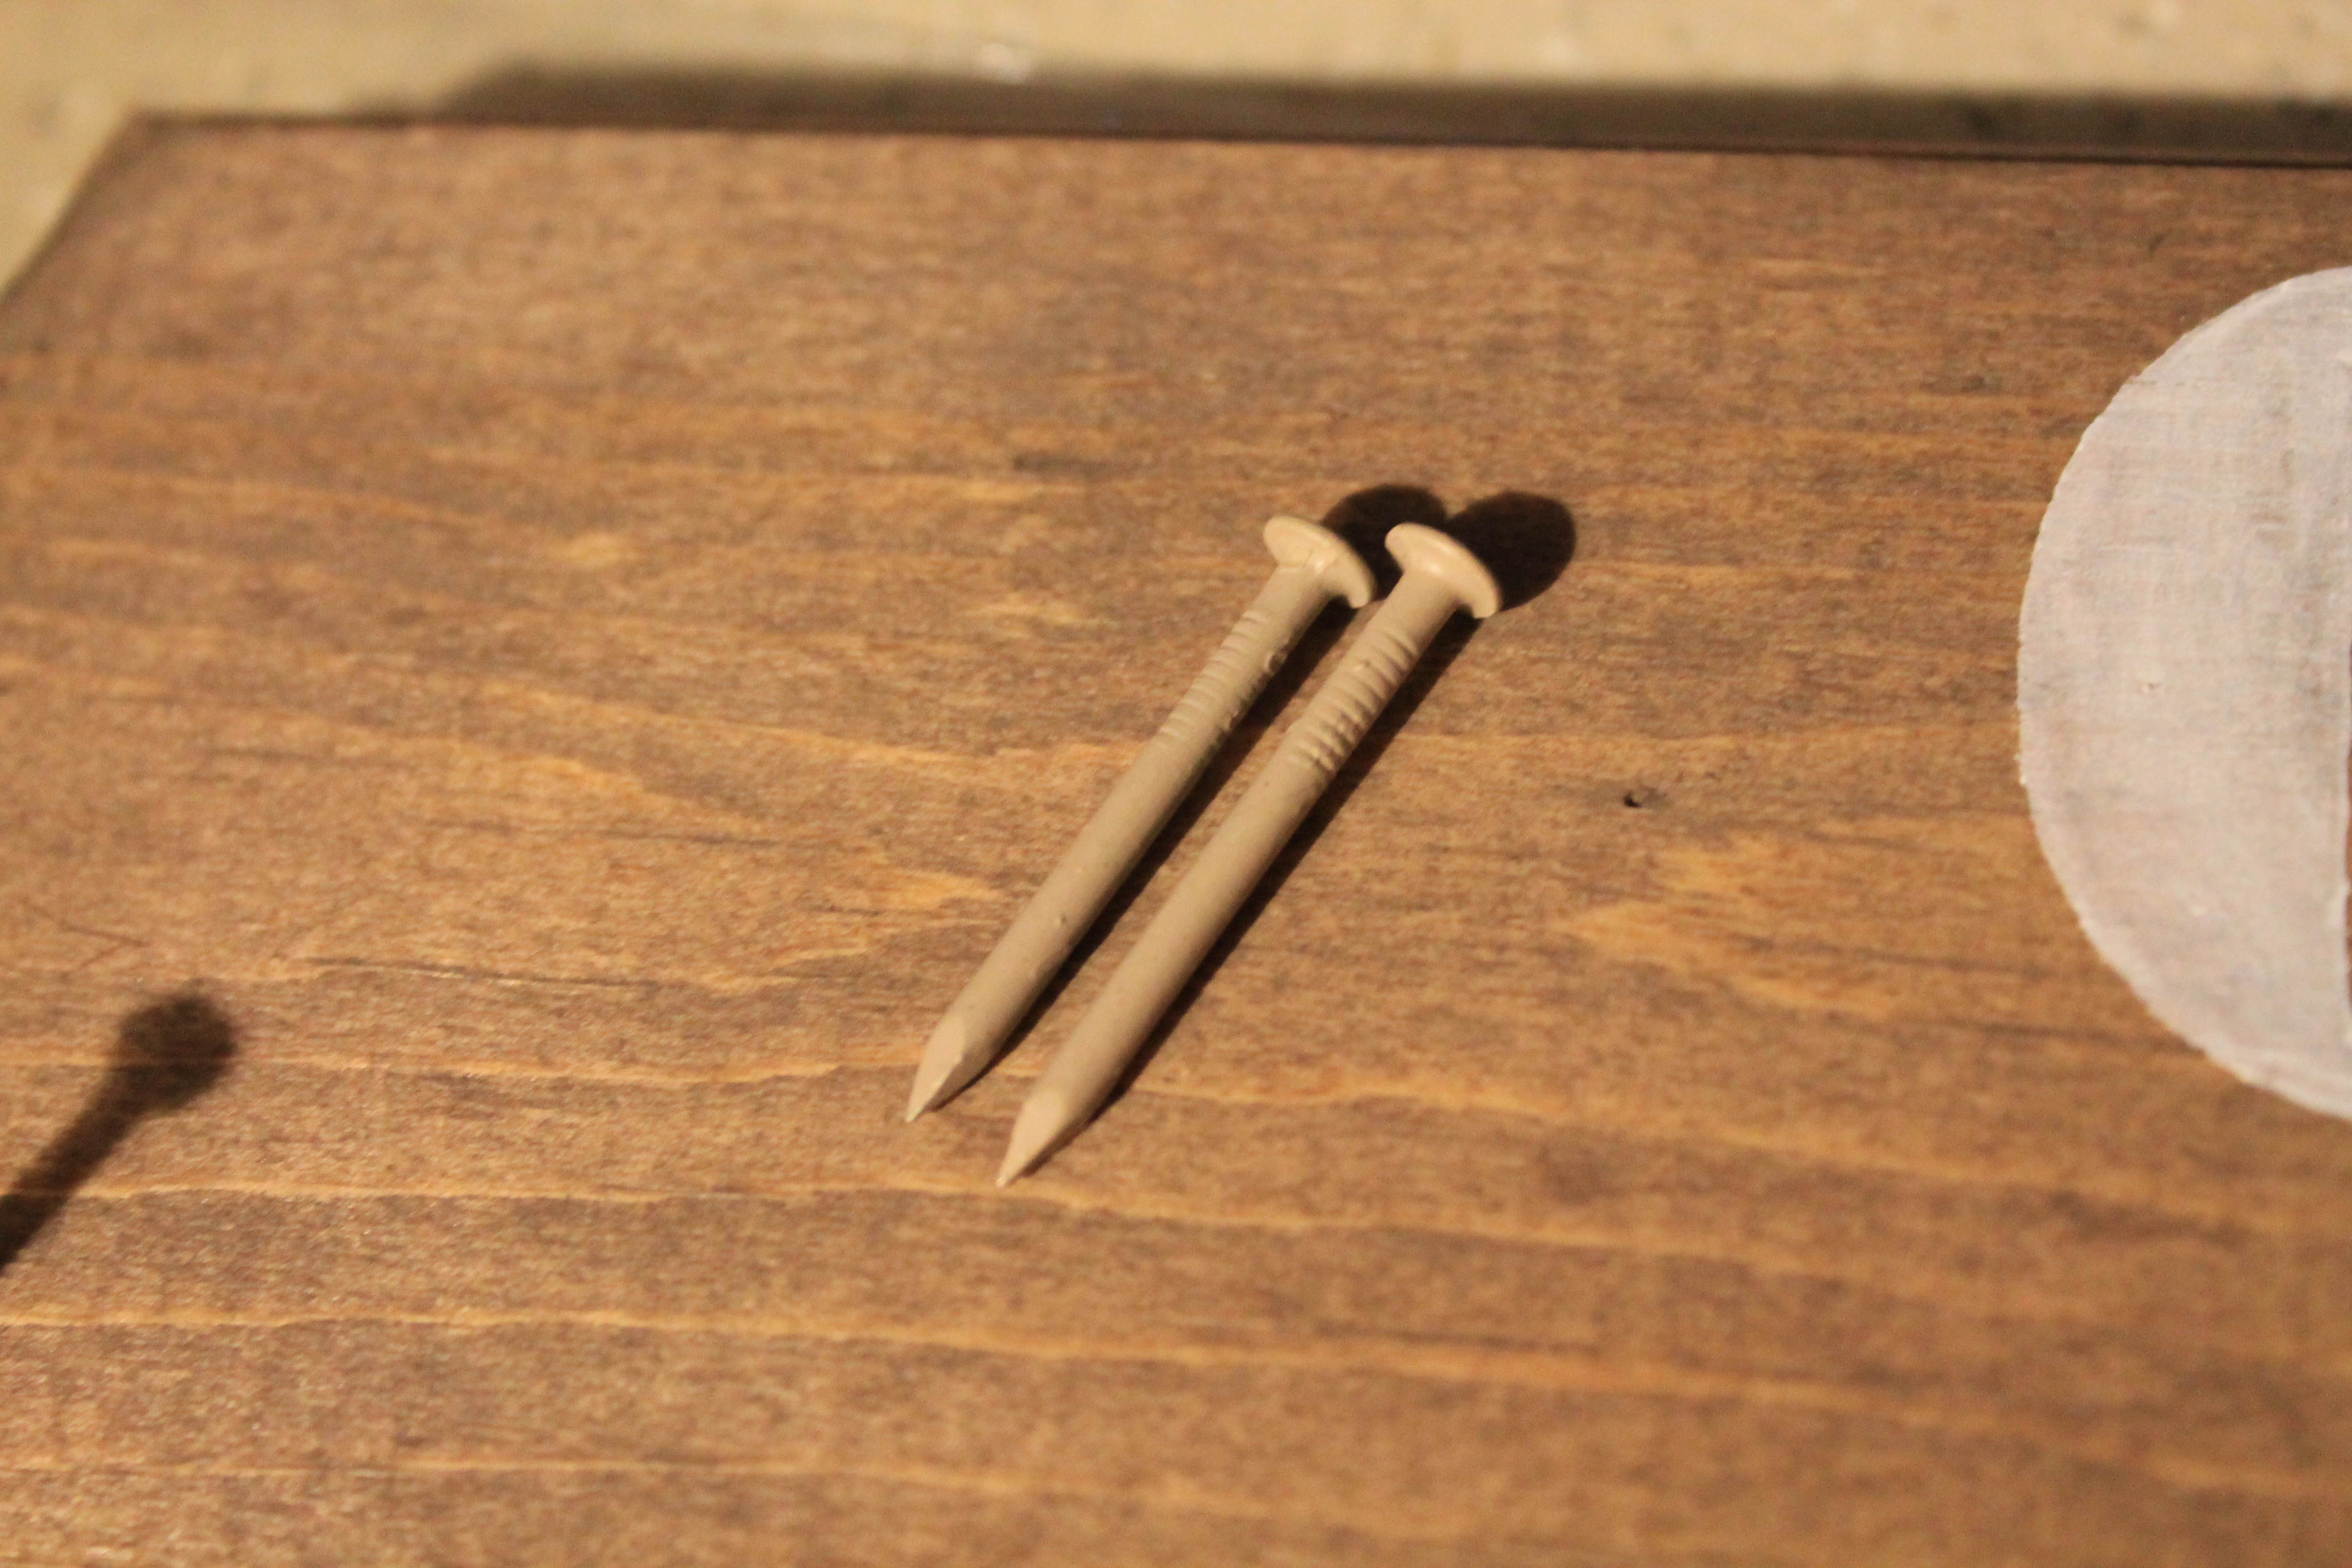
I personally just eye-balled it but whatever it is you prefer, be my guest. Some people are more anal than others. Personally, I’m not really into that. . . . #I’veGotJokes. Oh, and if I didn’t mention it before, you need a hammer.
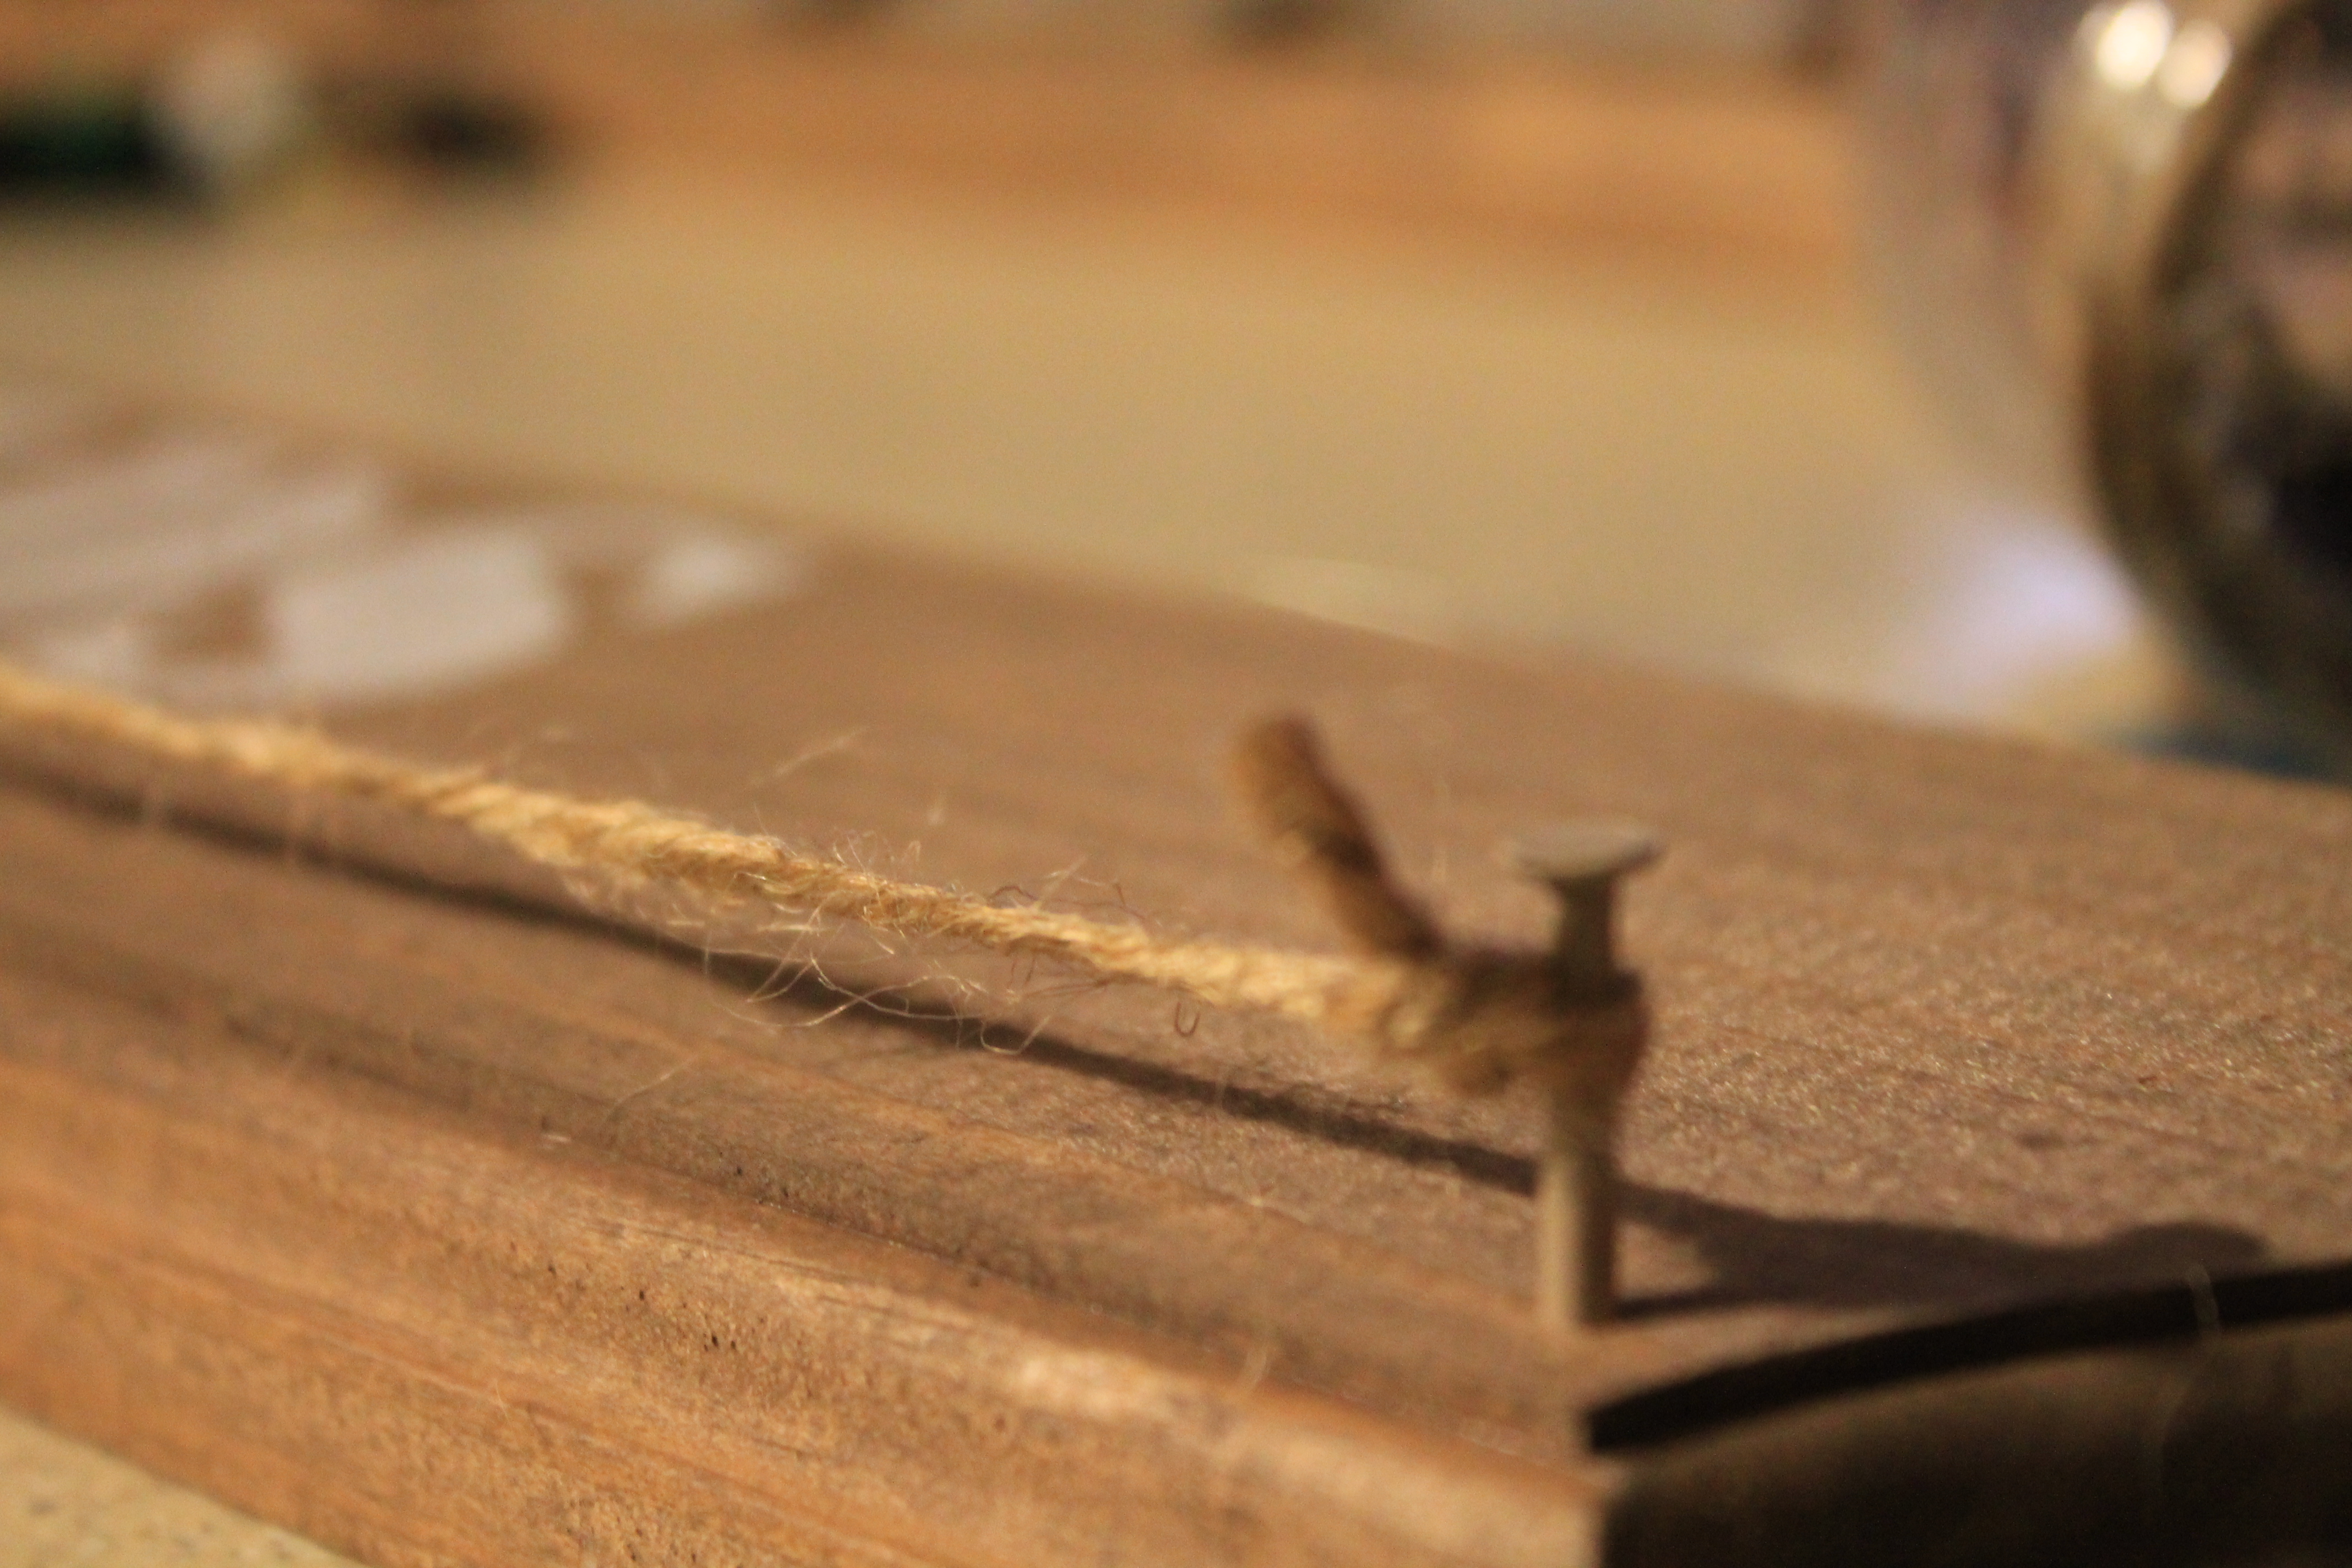
Step Four: Attaching the hemp twine. It’s pretty simple really, just tie the hemp to each nail and make sure it’s rather taught. If it isn’t, your photos will sag once you hang them. If that’s the look you’re going for then by all means, slip it some slack!
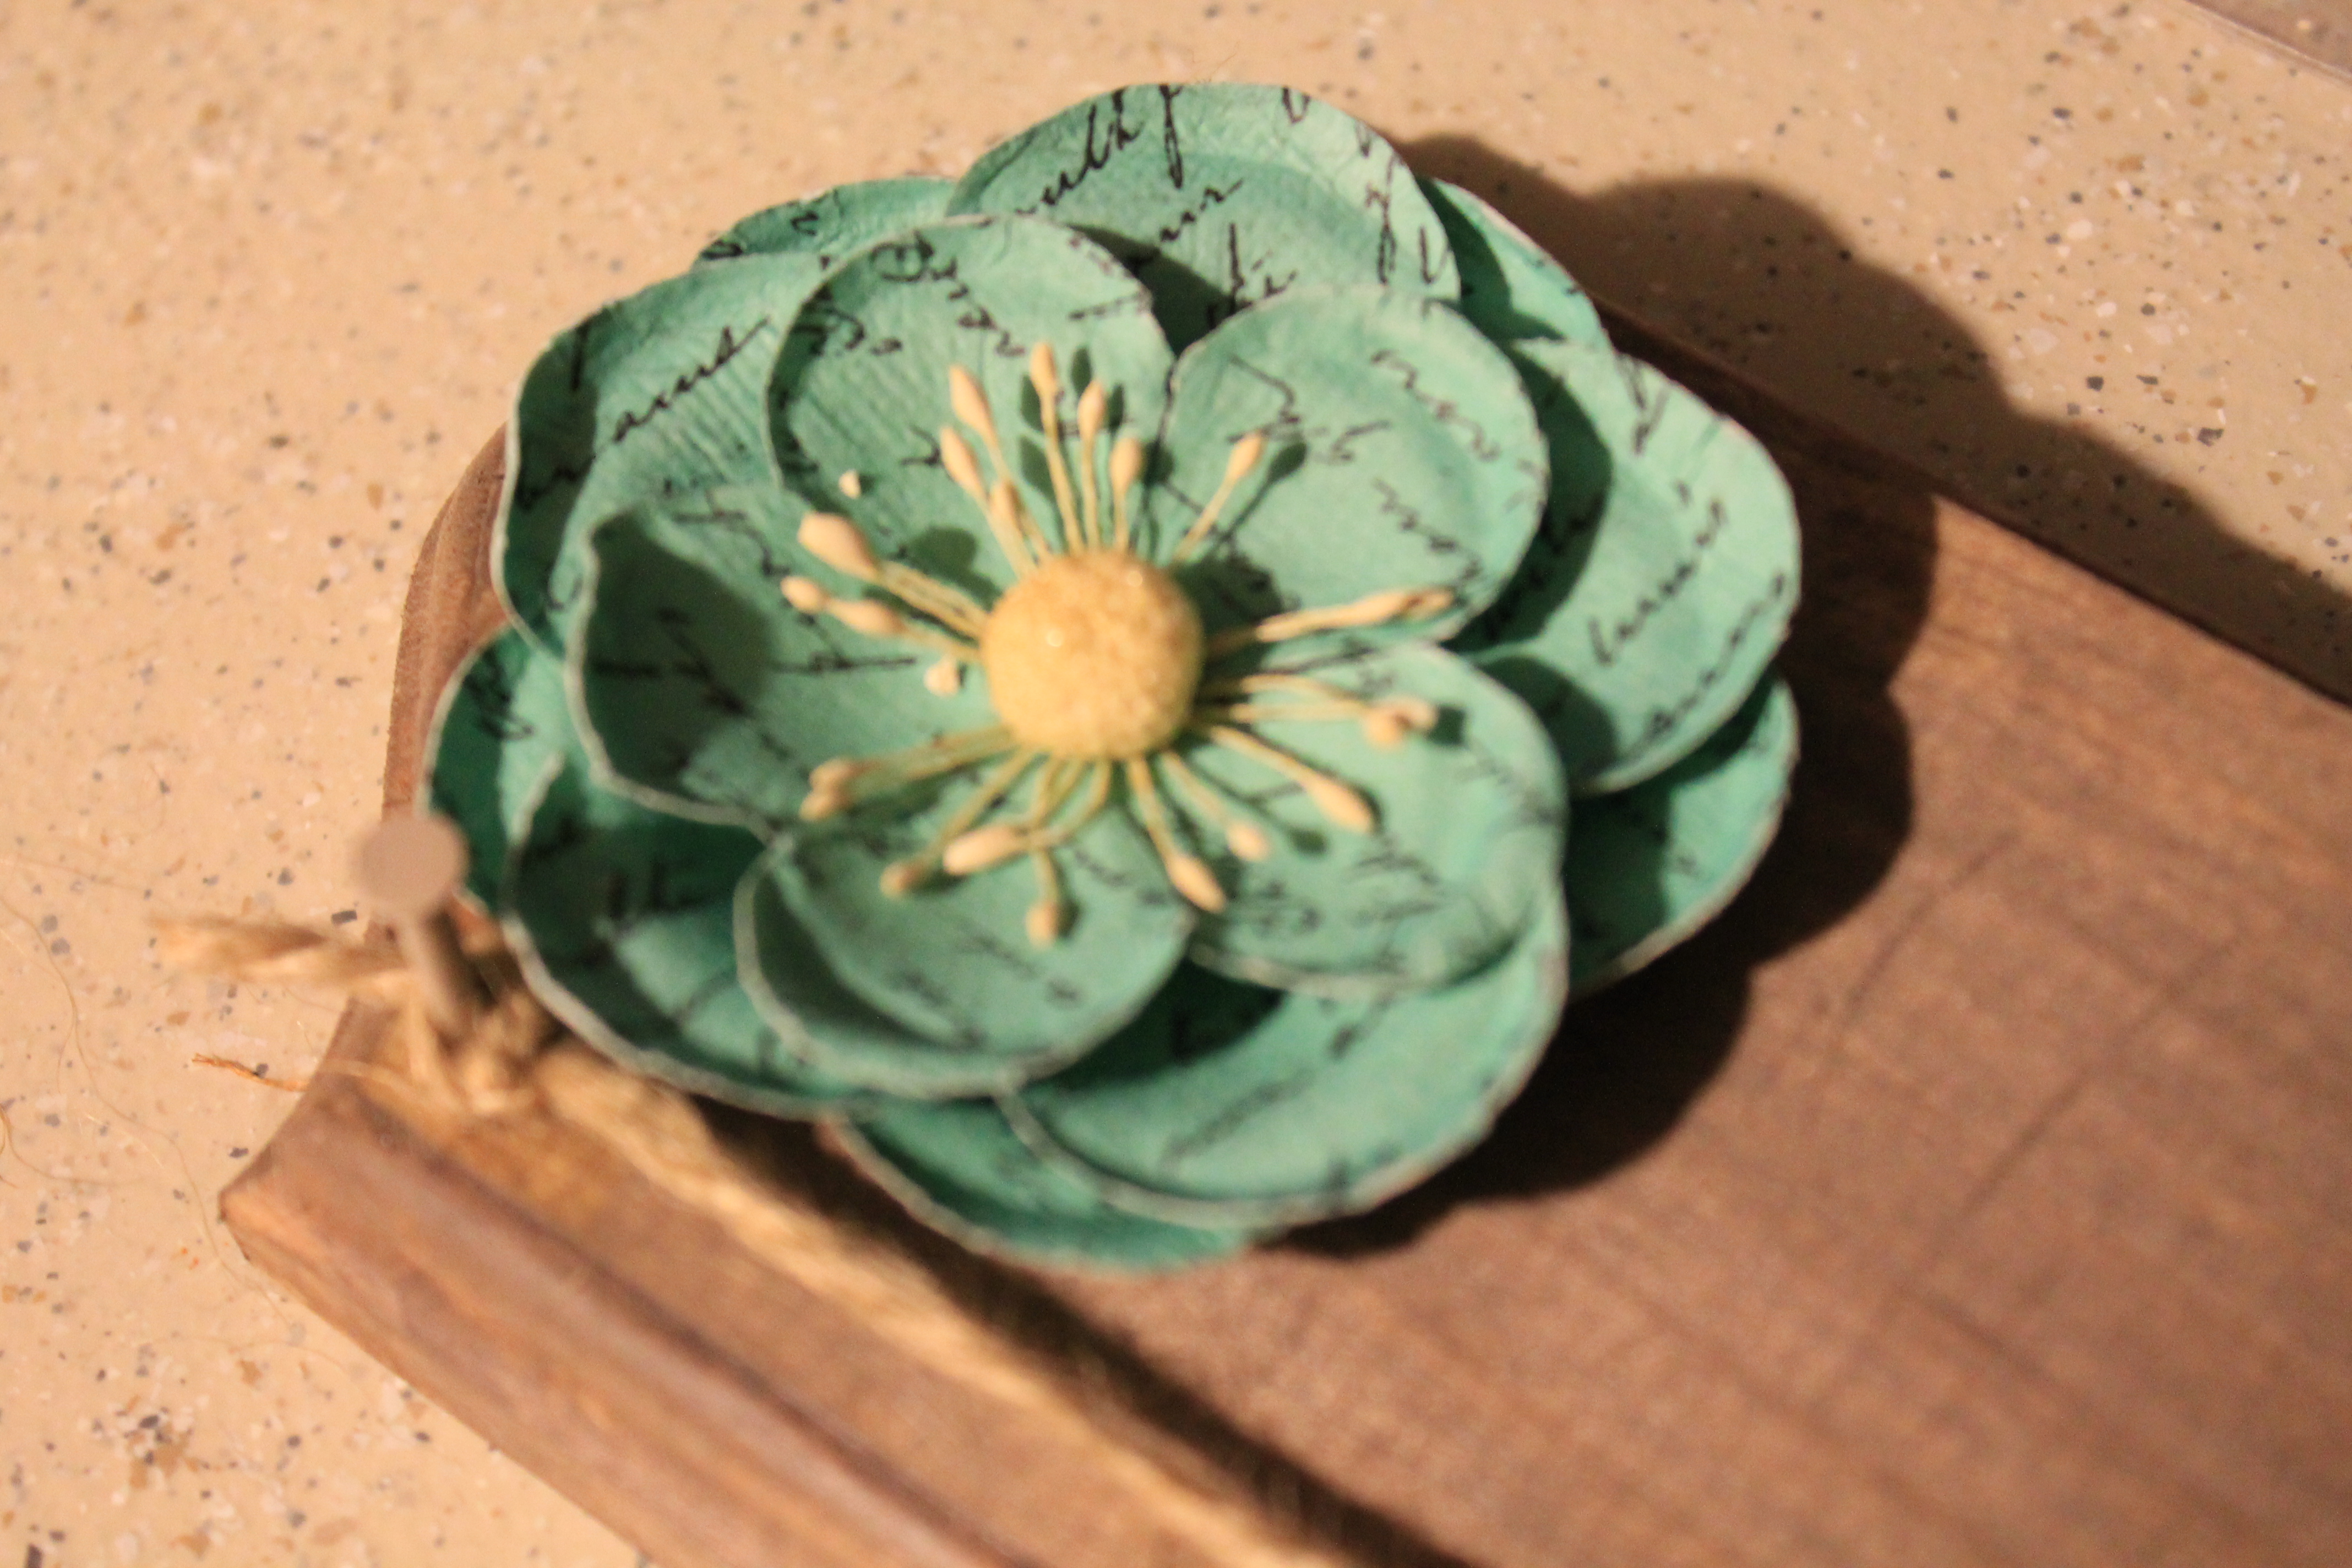
Step Five: Attach those cute little flowers you’ve been waiting to use! First off, remember to heat up your hot glue gun! (I always forget that step in everything, go to squeeze out glue. Boom! No glue. Also, really hard to squeeze.) Once your gun is heated, put a little glue on the back of each flower and place them wherever you please!

I went for the paper flowers as opposed to the fabric option that Sarah’s blog mentioned. I honestly didn’t have a preference I just happened to come across these first while creeping the craft store and I liked the colors. Fabric would be cute too, these were just more my style.
Step Six: Attach the ribbon. Take your burlap ribbon and cut two equally length pieces then staple them to the back of your plaque. I personally tied the bow first THEN stapled it to the plaque. This helped me to make sure the bow was equally centered, . . . at least my brain thinks so.

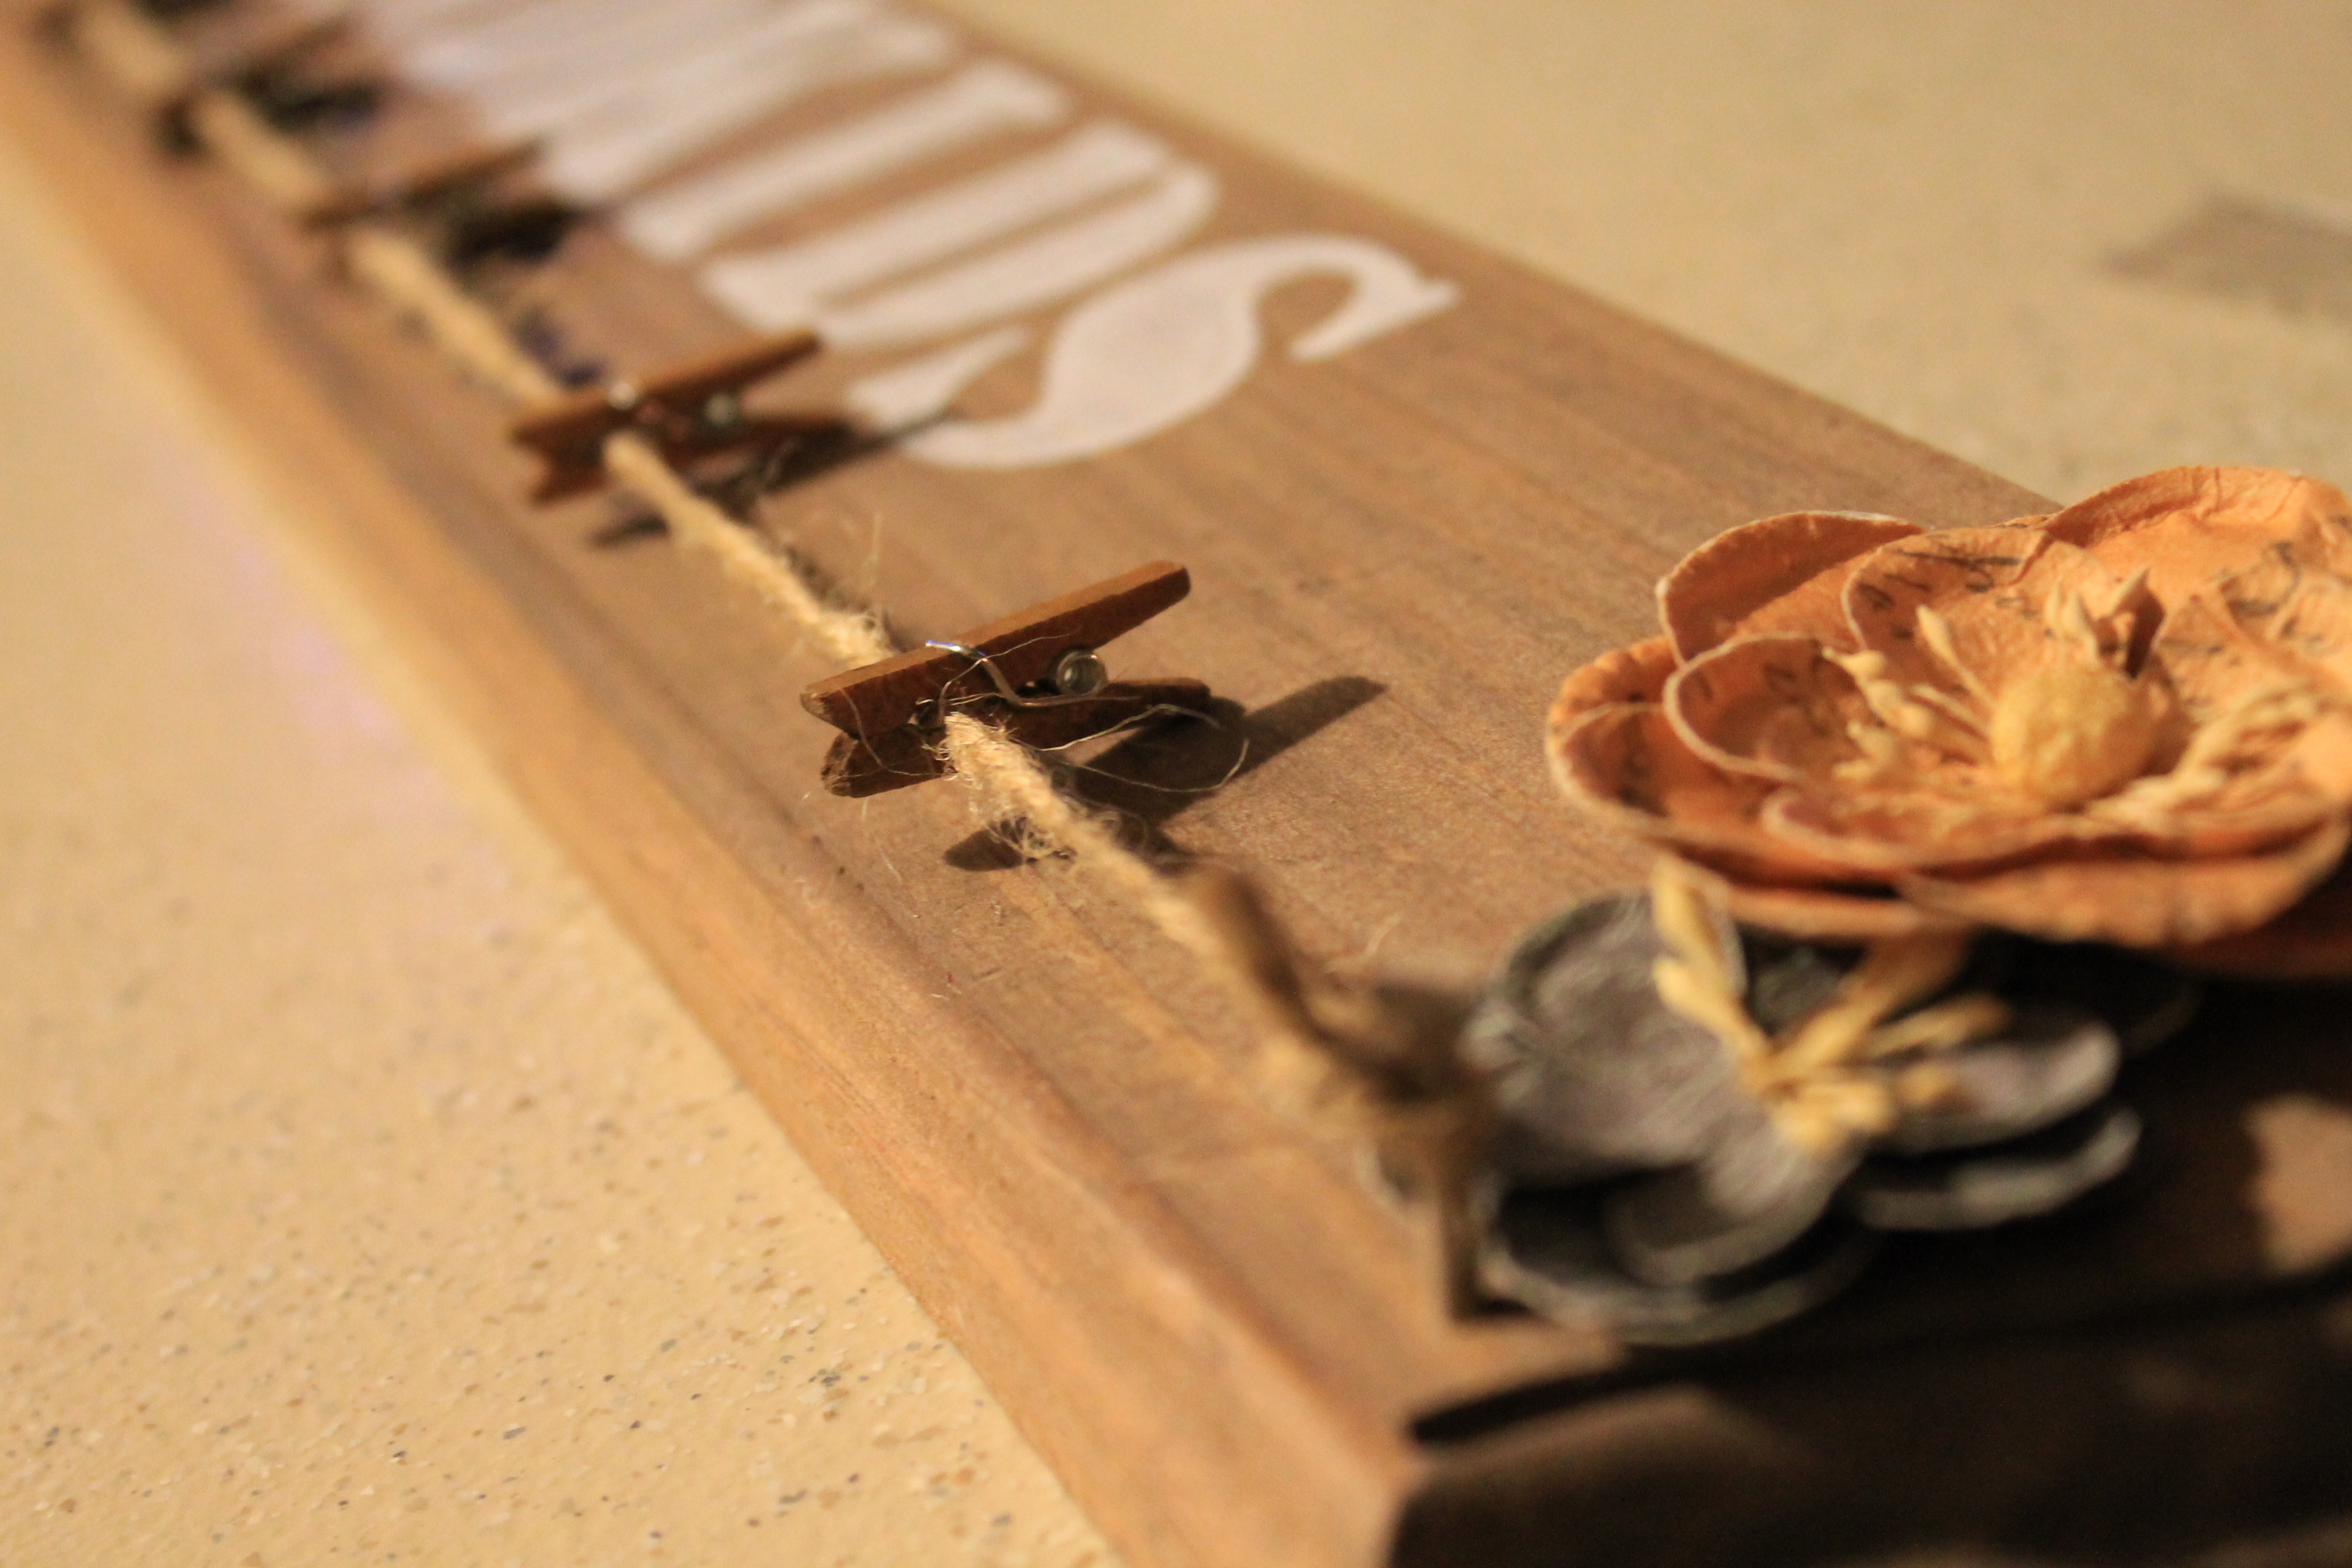
Step Seven: Take those cute little clothespins you’ve collected and get to pinning! This was my favorite step as I’m OBSESSED with all things Mini. I also loved selecting which pins I wanted to use as Michaels had SO many cute colors I never had expected.
& finally, you’re finished! Well minus adding the photos. I personally added pictures of our little Paige before I gave them as gifts but I mistakenly forgot to photograph them before I gave them away as gifts! Sometimes it slips my mind I’m actually going to blog all of this. . . I’m learning. Slowly. But regardless, below is the final product!
It’s so cute! (Although I must say it was even cuter when I added my little munchkin’s snap shots! It was the perfect gift for the grandparents. My in-laws even hung it in their living room, a place that no child has ever landed before in the history of the Scally household. #ProudMoment!
So in closing I would just like to thank Sarah over at My Simple Obsession for providing me such a wonderful idea and challenging me to create something meaningful for the Grandparents! So tell me, which projects have challenged you? I would love to hear your thoughts and especially projects you’ve tackled. . . as I may try them myself!
Cheers!
♥ – C